🌸 Just a Tiny Amount Can Be Enough: How to Support Longer Orchid Blooming Safely
# 🌸 Just a Tiny Amount Can Be Enough: How to Support Longer Orchid Blooming Safely
Viral plant-care tips often promise that one capful, one cup, one spoon, or a small amount of a kitchen ingredient will make a plant suddenly produce roots and flowers. Those claims are attractive because they make plant care sound simple. In reality, healthy growth depends on several factors working together: roots, light, water, temperature, air movement, potting mix, and appropriate nutrition. If one of those basics is badly wrong, adding a stronger treatment can make the plant weaker instead of stronger.
This article looks at **supporting long-lasting bloom cycles** in a practical way. The goal is not to promise an impossible transformation in a few days. It is to explain when a small treatment may be useful, how to apply it safely, how to avoid damaging sensitive roots, and which changes genuinely show that the plant is recovering. A careful routine may sound less dramatic than a “miracle” trick, but it is far more useful over the long term.
## Table of Contents
– Diagnose the real problem first
– Inspect roots and potting mix
– Apply the method safely
– Water according to need
– Improve light and temperature
– Feed without overdoing it
– Understand homemade plant remedies
– Follow a four-week recovery routine
– Watch for real signs of improvement
– Avoid common mistakes
– Frequently asked questions
– Final takeaways
## Diagnose the Real Problem First
Before adding fertilizer or a homemade solution, inspect the whole plant. Wilting can be caused by dry soil, but a plant with badly damaged roots can look almost identical because rotten roots cannot absorb water efficiently. Yellow leaves may result from overwatering, poor light, natural aging, nutritional imbalance, or an excessive fertilizer concentration. A plant that refuses to flower may simply be receiving too little light or may be in a normal vegetative growth phase.
Feel the potting mix several centimeters below the surface. Lift the pot and learn how heavy it feels when wet and when nearly dry. Look under leaves and around new growth for spider mites, thrips, scale, or mealybugs. If the plant has a pest infestation or active root rot, solve that problem first.
It is also useful to remember that one yellowing old leaf does not automatically mean a nutrient deficiency. Plants naturally replace older leaves. Look for patterns: several new leaves turning pale, widespread decline, or a sudden change after watering or feeding.
## Healthy Roots Are the Real Foundation
For most Phalaenopsis orchids, healthy roots feel firm and resilient. They may appear green after watering and silvery-gray as they dry. Soft, hollow, black, brown, or slimy sections often indicate damage or rot. If pruning is necessary, use clean, disinfected scissors and remove only tissue that is clearly dead.
Ordinary houseplant soil is usually too dense for epiphytic orchids. Coarse orchid bark allows air to move around the roots and lets excess water drain quickly. A clear plastic pot with drainage and ventilation holes is especially useful because it allows you to monitor root condition without disturbing the plant.
Do not pack the bark tightly. Small air spaces are part of the design. The crown should remain above the medium, and water should never sit trapped around the base of the leaves.
## How to Apply This Method Safely
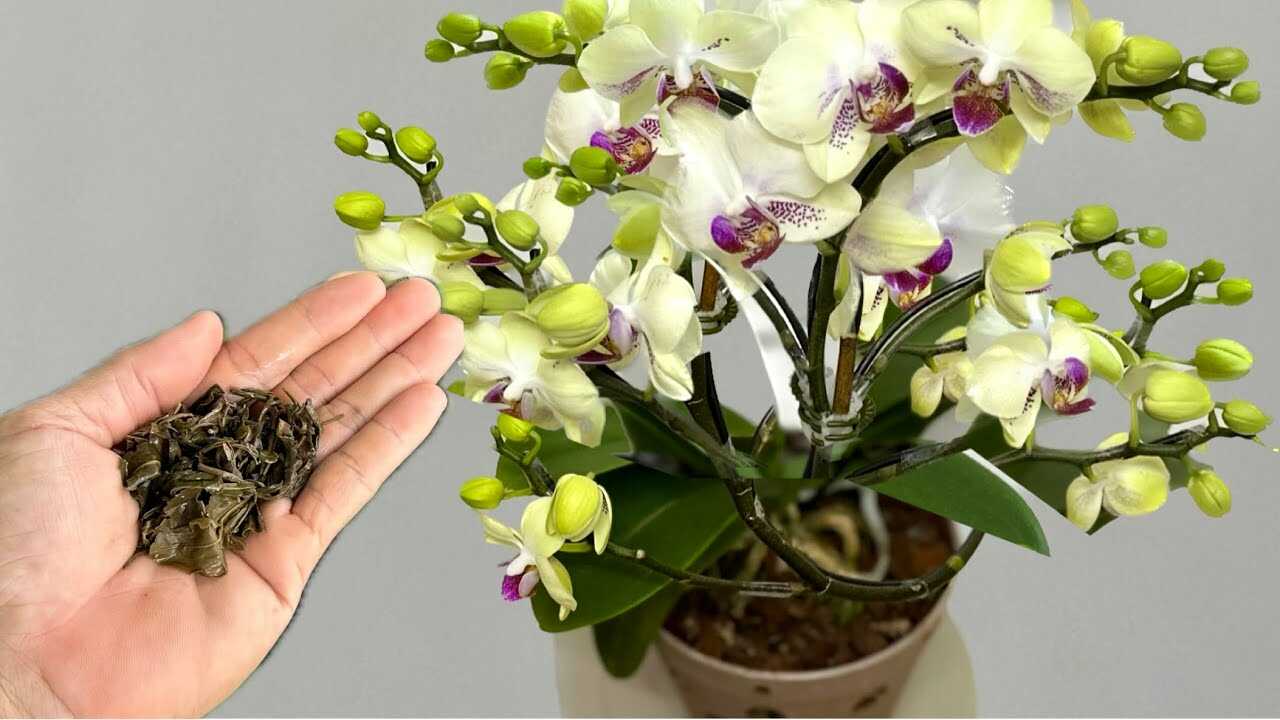
The central idea here is **supporting long-lasting bloom cycles**. The safest interpretation of the method is to use **low fertilizer doses during active growth** while keeping the rest of the care routine stable.
Orchid roots are sensitive to salt buildup. A low concentration is usually safer than a strong one-time feed. Periodically flushing the medium with clean water can help reduce accumulated salts.
Start with a small test rather than a dramatic dose. Keep the same pot, the same position, and the same normal watering pattern so that you are changing only one variable. Then give the plant time. A thirsty plant may perk up within hours after proper watering, but true root growth and flower formation take much longer.
Take a photo on the day you begin. Photograph the roots if they are visible and the plant from the same angle. Compare again after four to six weeks. This is a much better way to judge progress than relying on memory.
## Water According to the Plant, Not the Calendar
One of the most common mistakes is watering because “it has been seven days.” Plants do not use the same amount of water every week. Warm temperatures, brighter light, lower humidity, pot size, air movement, and the type of potting mix all affect drying speed.
When water is needed, water thoroughly and allow the excess to drain completely. Do not leave the pot standing in water for hours. Then let the medium dry to the level appropriate for the species before watering again.
For orchids, pay attention to bark moisture, visible root color, and pot weight. For anthuriums, watch the upper layer of the mix and avoid letting the entire root ball remain saturated. For other houseplants, learn the difference between a heavy freshly watered pot and a lighter pot that is ready for water.
A rigid “one cup every week” schedule is therefore less reliable than observing the plant itself.
## Light Determines How Much Energy the Plant Can Use
Fertilizer is not a substitute for light. Plants use light to build the energy required for new roots, leaves, and flowers. In a very dark location, adding more fertilizer cannot force healthy growth and may instead lead to salt buildup around roots.
Place the plant where it receives the amount of light suited to its species. Many orchids and anthuriums appreciate bright, indirect light. Harsh midday sun through glass can scorch leaves, so direct exposure should be introduced cautiously.
If a plant has spent months in deep shade, move it gradually toward a brighter position rather than placing it suddenly in strong sun. New conditions should improve the plant, not create a second source of stress.
## Temperature, Humidity, and Air Movement Matter Too
Temperature affects both water use and growth rate. In a warm room, potting mix often dries faster. In a cooler room, the same pot can stay wet for much longer. That is another reason a fixed watering calendar is unreliable.
Many tropical houseplants appreciate moderate to higher humidity, but very humid, stagnant air is not automatically healthy. Poor air movement can encourage fungal and bacterial problems. Gentle air circulation is beneficial, especially around orchids with exposed roots and around densely grouped plants.
Avoid placing a stressed plant directly beside a radiator, air-conditioning vent, or cold draft. Stable conditions are usually better than repeated relocation.
## Feeding: Mild and Predictable Is Better
Use a complete fertilizer made for the type of plant you are growing and follow the product directions. Fertilizer strengths differ widely, so “one teaspoon” or “one capful” cannot be treated as a universal dose.
During active growth, a weak solution used at sensible intervals is often safer than a concentrated feed. In periods of very low light or slow winter growth, reduce feeding.
Do not heavily fertilize a plant that has just suffered severe root damage, extreme dehydration, or a major pest attack. Damaged roots need oxygen and stability before they need more dissolved salts.
If you see white crust on bark or soil, burned root tips, or suddenly browning leaf margins after repeated feeding, salt buildup may be involved. Flushing the medium with clean water and reducing the fertilizer concentration can help.
## Homemade Remedies: Useful Experiments, Not Guaranteed Fertilizers
Coffee, garlic, aloe vera, rice water, banana peel, onion peel, and other kitchen ingredients appear frequently in plant-care videos. Some contain minerals or organic compounds, but homemade mixtures do not have a standardized nutrient analysis. One batch can be much stronger than another.
Organic residues can also ferment inside a warm, damp pot. That can encourage fungus gnats, mold, unpleasant odors, and reduced airflow around the roots.
If you want to experiment with a homemade treatment, make only a small amount, dilute it well, and avoid leaving chunks or a thick layer of residue in the potting mix. Test one plant first and do not combine several homemade products at the same time.
A standardized commercial fertilizer is not as exciting as a secret kitchen ingredient, but its known concentration makes dosing much easier and safer.
## A Practical Four-Week Recovery Routine
### Week 1: Stabilize
Inspect roots, drainage, potting mix, and light. Remove only tissue that is clearly dead. Correct standing water or a badly compacted medium. Avoid strong fertilizer.
If repotting is necessary, choose a pot that fits the root system rather than one that is dramatically larger. Keep the plant in stable light after repotting.
### Week 2: Observe
Watch how quickly the medium dries. Notice whether leaves remain firmer and whether the plant is using water at a normal pace. Water only when the plant actually needs it.
If the plant is stable and actively growing, you may begin the chosen mild method. Do not increase the dose just because there is no immediate visible result.
### Week 3: Compare
Compare the plant with the photo from the beginning. Look for root tips, a small emerging leaf, better leaf firmness, or simply the absence of further decline.
Those are meaningful improvements. A plant does not have to flower yet to show that the treatment and corrected care are helping.
### Week 4: Decide
If the plant is responding well, continue the low-intensity routine. If it is getting worse, stop experimental treatments and return to simple basic care: correct water, light, airflow, and root conditions.
Do not chase a declining plant with stronger and stronger doses.
## How to Recognize Real Recovery
Flowers are not always the first or best sign. On a weakened plant, new firm roots, healthy new leaves, and the end of active decline are more important.
An orchid recovering from root loss may spend months producing roots before it produces a flower spike. That is not a failure. It is the plant rebuilding the system it needs to support future blooms.
For anthuriums and other flowering houseplants, look for healthy new leaves, strong petioles, active root growth, and eventually new buds.
A plant that becomes greener overnight after an application may simply have been watered at the same time. Long-term observations are much more meaningful.
## When Repotting Helps—and When It Does Not
Repot when the potting mix has broken down, the roots are rotting, the container is damaged, or the plant has genuinely outgrown the available space.
Do not repot merely because the plant has not flowered for a month. Every repotting disturbs roots and can temporarily slow growth.
Avoid choosing a pot that is far too large. A large volume of wet medium around a small root system dries slowly and can create exactly the root problems you are trying to solve.
When root rot has been present, discard severely broken-down contaminated medium rather than putting it back around freshly trimmed roots.
## Clean Tools Reduce the Risk of Setbacks
Use clean scissors or pruning tools when trimming roots. Wash reusable pots and avoid transferring old decomposed medium from a sick plant into a fresh setup.
Disinfect tools between plants. This simple step reduces the chance of moving pathogens from one plant to another.
Cleanliness matters especially when working with soft, damaged tissues that are more vulnerable to infection.
## Seasonal Changes Should Change Your Routine
In spring and summer, many indoor plants receive more usable light and grow faster. They often use more water and can make better use of regular nutrition.
In autumn and winter, shorter days and lower light levels slow many species. The same watering and feeding schedule that worked in July may be excessive in December.
Adjust care to current conditions instead of following the calendar blindly.
## Understanding Flowering
Flowering is not a continuous process. Even a perfectly healthy plant can have a rest period. An orchid may finish flowering and then spend months producing leaves and roots. An anthurium may temporarily produce fewer flowers when light levels fall.
Do not interpret every pause in flowering as a deficiency. If the plant has healthy roots, firm leaves, and normal new growth, the basic care may already be correct.
The goal is to build a plant strong enough to bloom naturally, not to force flowers from an exhausted root system.
## Common Mistakes to Avoid
### Changing Too Many Things at Once
Repotting, pruning, moving the plant, changing fertilizer, and applying a homemade remedy in the same week create unnecessary stress and make it impossible to know what helped or harmed the plant.
### Watering More After Feeding
Extra water does not automatically help nutrients reach the roots. Permanently wet medium reduces oxygen and can lead to rot.
### Using a Stronger Concentration for Faster Results
Root tips are sensitive to salts. Excess fertilizer can burn roots, brown leaf tips, and stop growth.
### Expecting Results in a Few Days
Root systems and flower buds do not rebuild overnight. Judge meaningful progress over weeks and months.
### Looking Only for Flowers
A plant producing strong roots and leaves but no flowers may actually be in an excellent recovery phase.
### Leaving Organic Material in the Pot
Thick coffee grounds, fruit pieces, or decomposing kitchen scraps can create mold, odors, and insect problems indoors.
## Frequently Asked Questions
### Can One Treatment Guarantee Blooming?
No. Flowering depends on species, maturity, light, temperature, root health, season, and overall energy reserves.
### How Quickly Should New Roots Appear?
During active growth, the first new root tips may appear within several weeks. After severe damage, recovery can take much longer.
### Can I Fertilize Immediately After Repotting?
If the roots were badly damaged, it is usually better to let the plant stabilize first. Some fresh potting mixes may also contain nutrients already.
### Is Tap Water Safe?
In many homes, yes. Very hard water can gradually cause mineral accumulation, especially when combined with frequent fertilizer use.
### Should I Mist the Leaves?
Not necessarily. Correct root watering and appropriate room humidity matter more. Constantly wet foliage in poor airflow can encourage spotting and disease.
### How Do I Know I Am Overfeeding?
Brown root tips, white mineral deposits on the medium, burned leaf margins, and sudden growth slowdown can be warning signs.
### What Should I Do if the Plant Gets Worse After a Homemade Treatment?
Stop using the treatment. If necessary, flush the medium gently with clean water and return to simple basic care.
### Should I Increase the Dose if Nothing Happens After One Week?
No. Lack of immediate visible change does not mean the dose is too weak. Plants need time to build roots and new tissue.
## Final Takeaway
A cup, spoon, capful, or “magic” ingredient can sometimes be part of a useful plant-care routine, but it is rarely the true reason a plant becomes healthy. The biggest improvements come from functioning roots, appropriate light, a suitable potting mix, careful watering, and nutrition that matches the plant’s actual growth rate.
Use supplemental treatments as support, not as a replacement for the basics. Change one factor at a time, observe the plant for several weeks, and judge progress by new roots and healthy leaves rather than instant flowers.
That approach may be less dramatic than a viral miracle trick, but it is much safer, more repeatable, and far more likely to produce a strong plant that can bloom well in the future.