🍄 How to Grow Mushrooms | From Those We Buy at the Market
🍄 How to Grow Mushrooms | From Those We Buy at the Market
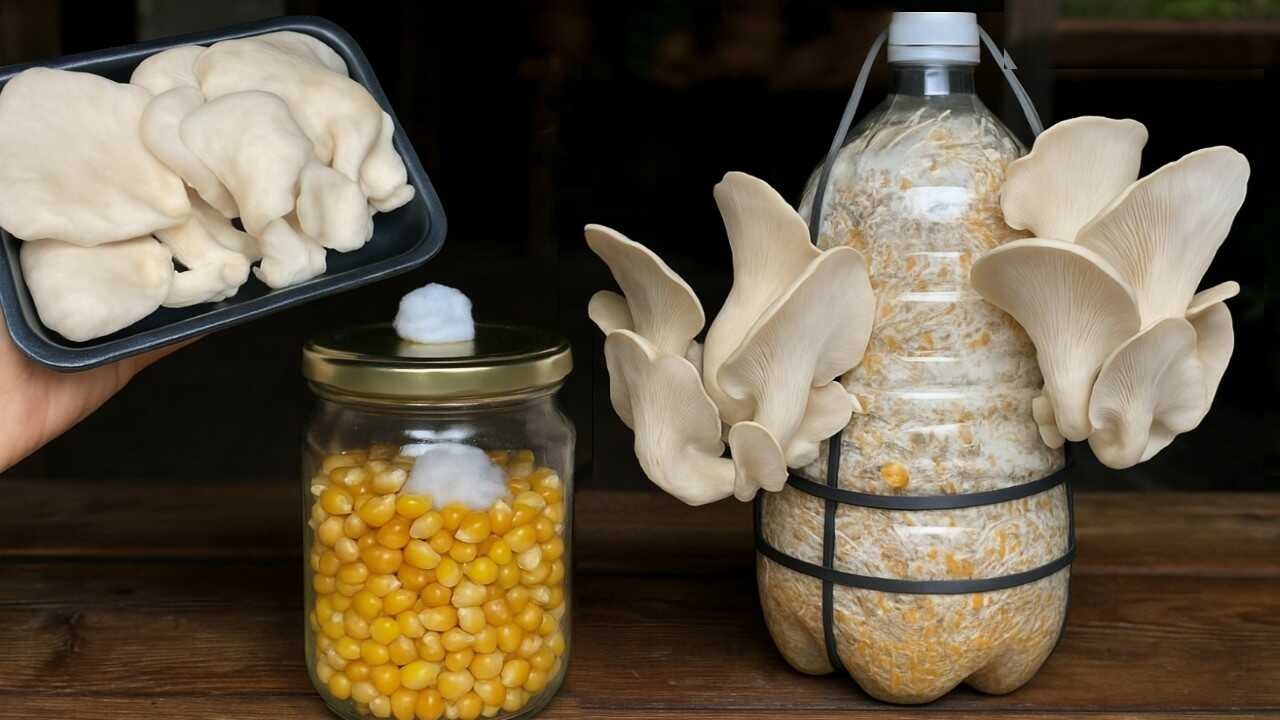
In the photo you can clearly see jars and a plastic bottle filled with bright yellow corn kernels used as a grain substrate, plus beautiful pale oyster caps fruiting from a colonized bottle. This article shows how to use those same **corn kernels** (popcorn/maize) as a practical **grain spawn** to grow oyster mushrooms at home — whether you plan to work from a commercial spawn or clone a fresh market mushroom.
Why use corn kernels?
Corn kernels are a dense, starchy, nutrient-rich grain that mycelium readily colonizes. They supply carbohydrates, some proteins and trace minerals that support vigorous mycelial growth, making them a legitimate option for **grain spawn** (similar to rye or wheat). Corn is easy to source, stores well dry, and if prepared correctly yields uniform, easily broken-up spawn for mixing into a bulk substrate.
Overview timeline (realistic)
- Soak and prep corn: 1–2 days
- Sterilize and inoculate grain: same day as sterilization
- Grain colonization: 1–3 weeks
- Spawn to bulk / bottle incubation: 1–2 weeks
- Fruiting and first harvest: 4–8 weeks from start
What you’ll need (small batch)
- 1 cup dry popcorn kernels (or other whole yellow corn)
- 2 cups clean water
- Glass jars (250–500 ml) with lids or autoclavable spawn bags
- Pressure cooker capable of 15 psi
- Oyster mushroom spawn or fresh oyster mushroom for cloning
- Pasteurized straw or coir for bulk (or a 2–3 L PET bottle with holes for fruiting)
- Rubbing alcohol (70%), scalpel/knife, gloves, clean workspace
Step-by-step: Make and use corn grain spawn
1) Prep and hydrate the corn
Measure 1 cup dry popcorn kernels and rinse thoroughly under running water. Soak the kernels in **2 cups** of water for 12–18 hours at room temperature.
2) Simmer and drain
After soaking, simmer the kernels 10–15 minutes until plump but before they split open. Drain in a colander and allow the kernels to steam-dry for 30–60 minutes until no free surface water remains. Proper moisture is key: when squeezed, only a couple of drops should appear.
3) Jar up and sterilize
Fill jars about two‑thirds full to leave headspace. Cover lids with a breathable filter (or use lids with holes stuffed with polyfil/cotton as shown). Sterilize in a pressure cooker at 15 psi for 60–90 minutes for 250–500 ml jars. For larger containers allow up to 90–120 minutes. Let cool completely (overnight) before inoculation.
4) Inoculate — options explained
- If you have commercial spawn or liquid culture: inject 1–2 cc liquid culture or place 1–2 colonized agar plugs per jar using sterile technique.
- If you want to clone a fresh market oyster mushroom: work in a clean still-air box or flow hood. Wipe the mushroom cap/stem surface with 70% alcohol, cut into the inner, uncontaminated tissue with a sterile blade, and transfer a small piece to agar. Isolate clean mycelium on agar first (1–2 weeks). Do not place raw tissue directly into grain jars — contamination risk is high. Once you have a pure agar culture, transfer plugs to sterilized corn jars.
5) Incubate grain jars
Keep inoculated jars at a stable temperature: 20–24°C (68–75°F) is ideal for many oyster strains. Expect full colonization in 1–3 weeks depending on strain and temperature. The grain should turn solidly white with mycelium.
6) Prepare the fruiting container (PET bottle shown)
Use a clean 2–3 L PET bottle: cut holes (2–4 holes about 2–3 cm) where you want mushrooms to fruit. Pasteurize a bulk substrate (straw or coir) by soaking at 65–70°C for one hour, then drain to field capacity. Combine colonized corn spawn with pasteurized bulk at a spawn rate of 1:4 by wet weight (20% spawn) — this balances speed and contamination resistance.
7) Pack, incubate, and fruit
Mix spawn and bulk substrate thoroughly, pack into the bottle, and incubate at the same 20–24°C range until fully white (usually 7–14 days). When the substrate is fully colonized, move to fruiting conditions: indirect light (8–12 hours daily), fresh air exchange, and high humidity (85–95%). Maintain humidity with a humidifier or misting.
Fruiting care: dosages and frequency
- Humidity: 85–95% — mist or run a humidifier. If misting, do so gently 2–3 times per day to keep surfaces moist without pooling water.
- Fresh air exchange: open the fruiting container or provide light fanning 2–4 times daily to prevent CO₂ buildup.
- Temperature for common oyster species: 15–21°C. Cooler strains prefer lower temps; warm strains tolerate up to 24°C.
- Harvest: pick when caps flatten but before edges curl up — usually the first flush is ready within the 4–8 week total timeline above.
Common mistakes to avoid
- Overhydrated grain: if kernels release lots of water when squeezed, jars will contaminate. Aim for “just moist” — a drop or two on squeeze.
- Insufficient sterilization: small jars need 60–90 minutes at 15 psi. Under-cooking invites mold and bacteria.
- Rushing cloning from supermarket mushrooms: placing raw tissue directly into grain jars without agar isolation almost always leads to contamination. Isolate on agar first or buy tested spawn.
- Using sugary corn syrup or sweetened corn products: these favor bacteria and contaminant growth; use whole dry kernels only.
- Ignoring hygiene: poor sterile technique while inoculating or transferring spawn is the main contamination source.
Practical tips from experience
- Popcorn kernels are inexpensive and easy for beginners — buy from food stores, not pre-popped.
- Label jars with strain, date, and inoculant type. That helps track which batches succeed.
- If a jar turns green, black, or pink, seal and remove it outdoors. Don’t open it near clean work areas.
- Reuse colonized corn as spawn for multiple small bottles or bags — break up the colonized corn with a clean spoon and mix into new pasteurized bulk.
- If you prefer less lab work, start by purchasing certified grain spawn and using the corn method just as a bulk component or spawn booster.
Conclusion — get started with a small trial
Using whole corn kernels as grain spawn is a practical, cost‑effective route to growing oyster mushrooms at home. Expect the full process to take at least 4–8 weeks from prep to first harvest, and treat this method as a complement to good sanitation, correct moisture, proper light, and fresh air. If you’re new, try one or two jars first, or buy commercial spawn and practice transferring to a small PET bottle like in the photo.
Ready to try? Prep one cup of popcorn tonight, sterilize and inoculate this week, and plan for your first small harvest within a few weeks. Share your results and learn from each flush — mushroom cultivation rewards patience and clean technique.