🍅 5 Techniques to Make Tomatoes Grow Stronger After Transplanting
🍅 5 Techniques to Make Tomatoes Grow Stronger After Transplanting
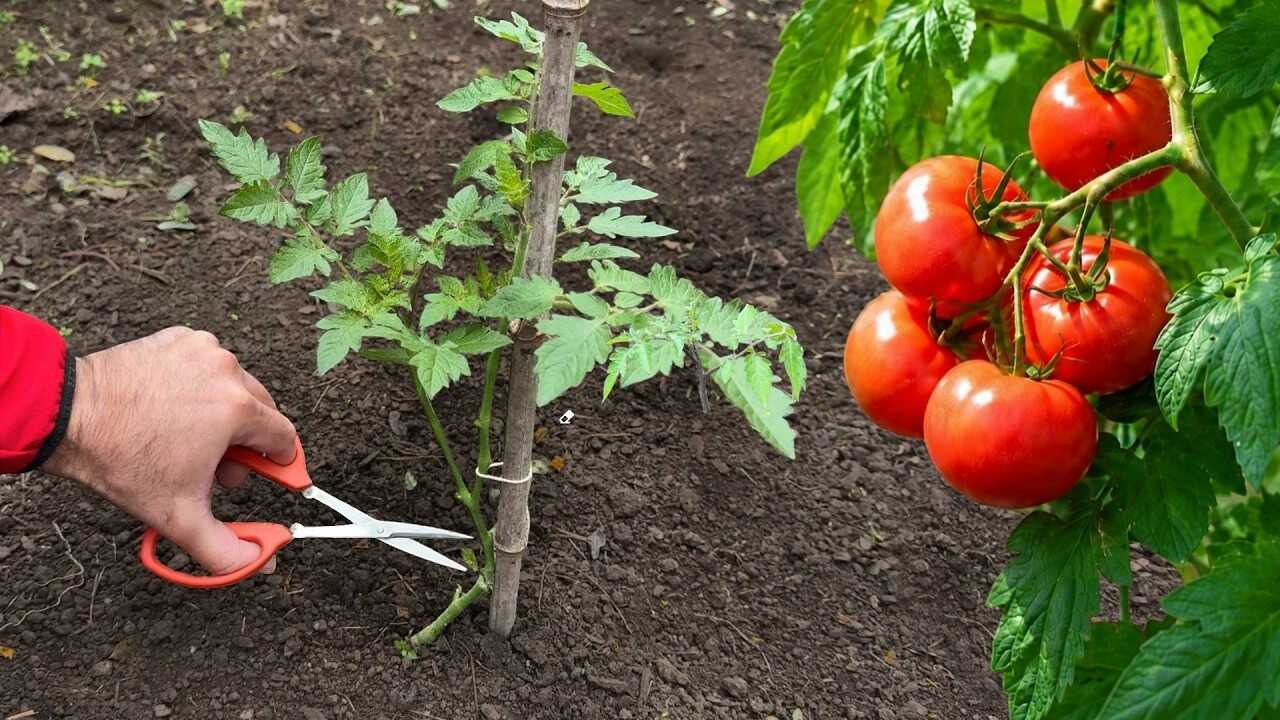
In the photo you can see a gardener using red-handled scissors to remove a small side shoot (a sucker) from a young tomato plant tied to a bamboo stake, with ripe tomatoes visible nearby. That precise action—cleanly cutting out suckers at the base and keeping the plant staked—is the visual anchor for this article. Below are five practical, evidence-based techniques centered on that practice to help newly transplanted tomatoes develop stronger stems, better root systems and healthier fruit set over the coming weeks.
1. Prune suckers correctly to focus energy
What to do: Remove side shoots (suckers) when they are about 2–4 inches (5–10 cm) long. Use clean scissors or bypass pruners and cut the sucker where it joins the main stem—don’t tear it off. Sanitize blades with 70% isopropyl alcohol before and after pruning to reduce disease spread.
- Frequency: Start weekly for the first 6–8 weeks after transplant, then check every 1–2 weeks until about 4–6 weeks before your expected first frost (allowing final fruit ripening).
- Why it helps: Removing suckers reduces competition for carbohydrates and nitrogen, directing growth into the main stem and fruiting trusses. It also improves air circulation and light penetration—both reduce foliar disease pressure.
2. Stake early and tie gently for upright growth
The image shows a bamboo stake and a soft tie. Staking immediately after transplant prevents stem damage and encourages a strong central leader.
- How to tie: Use soft materials (cloth strips, old pantyhose, or soft nursery tape). Tie the stem to the stake every 6–8 inches (15–20 cm) as the plant grows.
- Frequency: Check ties weekly and loosen as the stem thickens to avoid girdling.
- Why it helps: Vertical support reduces bending and stem abrasion, encouraging thicker xylem development and better water/nutrient transport.
3. Apply a kelp (seaweed) root drench to reduce transplant shock
What to use: Liquid kelp/seaweed extract—rich in natural auxins, cytokinins and trace minerals—can stimulate root growth and stress resilience.
- Preparation & dose: Mix 1 tablespoon (15 mL) of liquid kelp per gallon (3.8 L) of water.
- Application timing & frequency: Apply as a root drench once immediately after transplanting, then repeat every 2 weeks for the first 6–8 weeks.
- Why it helps: Seaweed extracts contain growth-regulating compounds and micronutrients that support root cell division and faster root establishment—documented uses in horticulture for transplant vigor.
4. Mulch and water deeply to build a steady root system
Good soil moisture management after transplanting is crucial for roots to expand downward rather than stay near the surface.
- Mulch: Apply 2–3 inches (5–7.5 cm) of organic mulch (straw, shredded leaves, or well-rotted bark) once the soil has warmed. Keep mulch pulled back about 1 inch (2–3 cm) from the stem to avoid crown rot.
- Watering: Provide a deep soak to total about 1 inch (2.5 cm) of water per week for the first 3–6 weeks to encourage deeper roots. In hot weather increase to 1.25–1.5 inches per week. Use drip irrigation or a soaker hose for slow, deep wetting.
- Check: Test soil moisture 2 inches (5 cm) below the surface—if it’s dry, water deeply.
5. Feed gently with compost tea or a starter fertilizer
Young transplants benefit from available phosphorus and microbial support for roots—without excess nitrogen that would encourage leafy growth over rooting.
- Compost tea recipe & dose: Steep 1 part finished compost in 5 parts water for 24–48 hours, strain, then dilute the strained liquid 1:5 with water before applying. Use as a root drench once at transplant and then every 2–3 weeks for the first 6–8 weeks.
- Starter fertilizer (optional): If using a granular starter with higher phosphorus (for example a 5-10-10), apply about 1 tablespoon (15 g) placed 2–3 inches (5–8 cm) from the stem at planting, or follow manufacturer rates for young plants.
- Why it helps: Compost tea supplies soluble nutrients and beneficial microbes to improve nutrient uptake and root health; a small, phosphorus-biased starter supports root establishment.
Practical tips from experience
- Always prune with clean tools and avoid removing more than 10–20% of foliage at a single session on a stressed transplant.
- For determinate varieties (bush types) prune minimally—focus on staking and watering instead. Indeterminate types respond best to regular sucker removal and staking.
- Work in the morning on dry foliage to lower disease risk and keep cut surfaces small and clean.
Common mistakes to avoid
- Don’t over-prune—removing too many suckers or leaves weakens the plant. Limit pruning to the schedule above and watch plant vigor.
- Don’t tie stems too tightly; check ties weekly to prevent girdling as the stem thickens.
- Avoid heavy nitrogen-rich feeding right after transplant—this favors top growth over root development and delays fruiting.
- Don’t pile mulch against the stem; that encourages rot and rodent damage.
Conclusion — get started and observe results
Follow these five techniques—cleanly prune suckers, stake and tie early, apply a gentle kelp drench, mulch and water deeply, and support roots with compost tea or a starter fertilizer—and you should see stronger stems and better root establishment within 3–8 weeks after transplanting, with ongoing benefits through the season. Remember these methods are complements to good light, soil drainage and balanced care—not miracle fixes. Try them on a few plants this season, observe the difference, and adjust timing or frequency for your microclimate. Happy gardening—then come back and share your results!