500 times stronger than garlic! Orchids immediately sprout buds and bloom all year round
500 times stronger than garlic! Orchids immediately sprout buds and bloom all year round
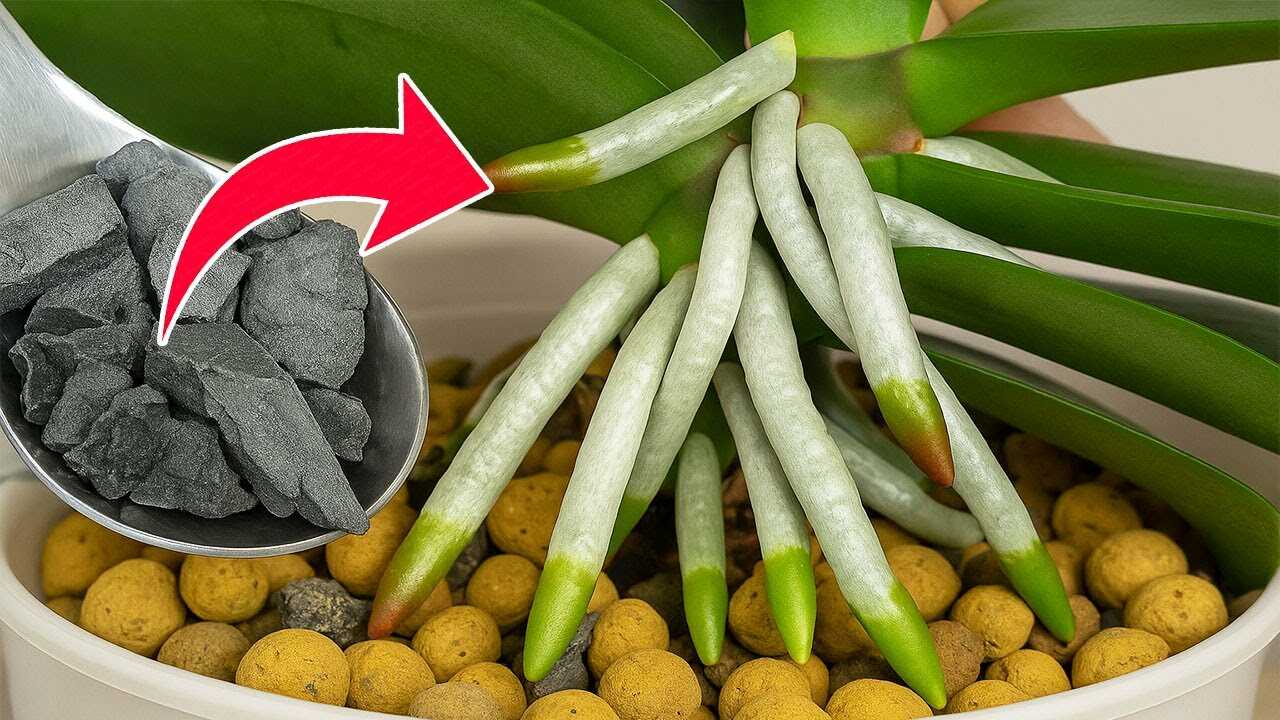
In the image you can clearly see small black, irregular chunks in a spoon — this is **horticultural charcoal** placed beside an orchid with pale aerial roots sitting over LECA. This article explains how that exact charcoal can be used safely and effectively to improve **orchid root health**, reduce rot risk and support stronger bud initiation over time. Remember: charcoal is a useful supplement, not a miracle — proper light, watering, drainage and feeding remain essential.
Why horticultural charcoal helps orchids (real, verifiable effects)
Horticultural charcoal is highly porous and adsorbs organic compounds and impurities that accumulate in potting mixes and irrigation water. Its physical structure also improves **aeration** and **drainage** in loose media like bark or LECA. Those two properties — adsorption of waste compounds and better oxygen around roots — are recognized benefits that help reduce conditions favoring root rot and microbial overgrowth. In short: charcoal supports healthier roots, and healthier roots increase the chance of reliable bud initiation when combined with good cultural care.
Materials and exact doses (do this, not vague estimates)
- Use: horticultural or garden charcoal (sold for potting); do NOT use BBQ briquettes or lump charcoal with additives.
- Particle size: pieces about 5–20 mm work well for orchid mixes and LECA blends.
- Repot mix ratio: add 10–15% charcoal by volume into bark or bark+LECA mixes (for example, 1000 ml potting mix → 100–150 ml charcoal).
- Top-dressing for LECA pots: scatter a 0.5–1 cm layer of charcoal on the surface or mix 5–10% charcoal among the LECA balls.
- Targeted root refresh (after trimming rotten roots): place about 1 tablespoon (15 ml) of charcoal per 5 cm of pot diameter distributed among roots before backfilling with media.
- Replacement/refresh frequency: refresh or rinse the charcoal and top layer every 6 months; fully replace potting media including charcoal when repotting (typically every 12–24 months for orchids in bark mixes).
Step-by-step: how to prepare and apply horticultural charcoal to orchids
1) Choose clean, horticultural-grade charcoal. Avoid any product with added accelerants or glues. Small horticultural chunks are ideal for orchids.
2) Rinse: place charcoal in a sieve and rinse under running water to remove dust. Let drain. (Most commercial horticultural charcoal is already effectively sterile; rinsing removes fines that cloud water.)
3) Optional gentle heat-sterilize: if you want extra caution, spread charcoal on a tray and bake in a household oven at 180–200°C (350–400°F) for 15–20 minutes. This step is optional for commercial horticultural charcoal and not required for every use.
4) Repotting method: remove the orchid gently, trim clearly rotten roots with sterile shears, rinse roots, then mix your potting media with 10–15% charcoal by volume. Backfill so roots are supported but the crown isn’t buried.
5) LECA/top-dress method: scatter a thin charcoal layer (0.5–1 cm) between or on top of LECA to help keep water and air cleaner around roots. Mix small charcoal pieces among LECA at about 5–10% volume for ongoing benefit.
What to expect — realistic timeframe
Charcoal improves the root environment gradually. Expect measurable improvement in root color/firmness and reduced odor or sliminess within about 6–12 weeks when combined with correct watering, light and fertilizer. Bud initiation and consistent blooming can follow over the subsequent months — but only if overall care is right. Charcoal helps the substrate stay healthier; it does not force immediate flowering.
Practical tips from experience
- Combine with proper watering: charcoal helps keep media fresher, but it will not fix chronic overwatering. Allow roots to dry appropriately between waterings for your orchid type.
- Use clean water: charcoal reduces some dissolved organics, but starting with moderate-quality water reduces stress on plants.
- Fertilize appropriately: charcoal is not a fertilizer. Continue a balanced orchid fertilizer at recommended dilute rates during the growing season.
- Mind the crown: do not pile charcoal (or any media) high on the crown — that can cause crown rot.
- Start small: try charcoal on one pot first to watch how your specific orchid responds.
Common mistakes to avoid
- Using BBQ briquettes or charcoal with additives — these can leach chemicals harmful to plants.
- Adding too much charcoal (e.g., >30% by volume) — excessive charcoal can make the mix too free-draining and cause rapid drying and nutrient loss.
- Thinking charcoal replaces light, water or fertilizer — it supports root health but must be paired with good culture.
- Failing to trim dead roots before adding charcoal — leaving rotted tissue will continue to encourage pathogens even with charcoal present.
Conclusion — try it and observe
Horticultural charcoal, the black chunks shown in the picture, is a simple, proven supplement to improve aeration and adsorb organic waste in orchid media. Use a measured dose (10–15% in mixes; 0.5–1 cm top-dress) and refresh every 6–12 months. Expect root health gains within 6–12 weeks and improved bloom reliability over the following months when you keep up standard orchid care. Try it on one plant, watch the roots and buds, and adjust based on what you see — healthier roots are the best path to more consistent flowering.
Ready to try? Gather horticultural charcoal, rinse it, and apply the 10–15% mix at your next repot — then monitor root condition over the next 6–12 weeks and keep nurturing light, water and feed.