
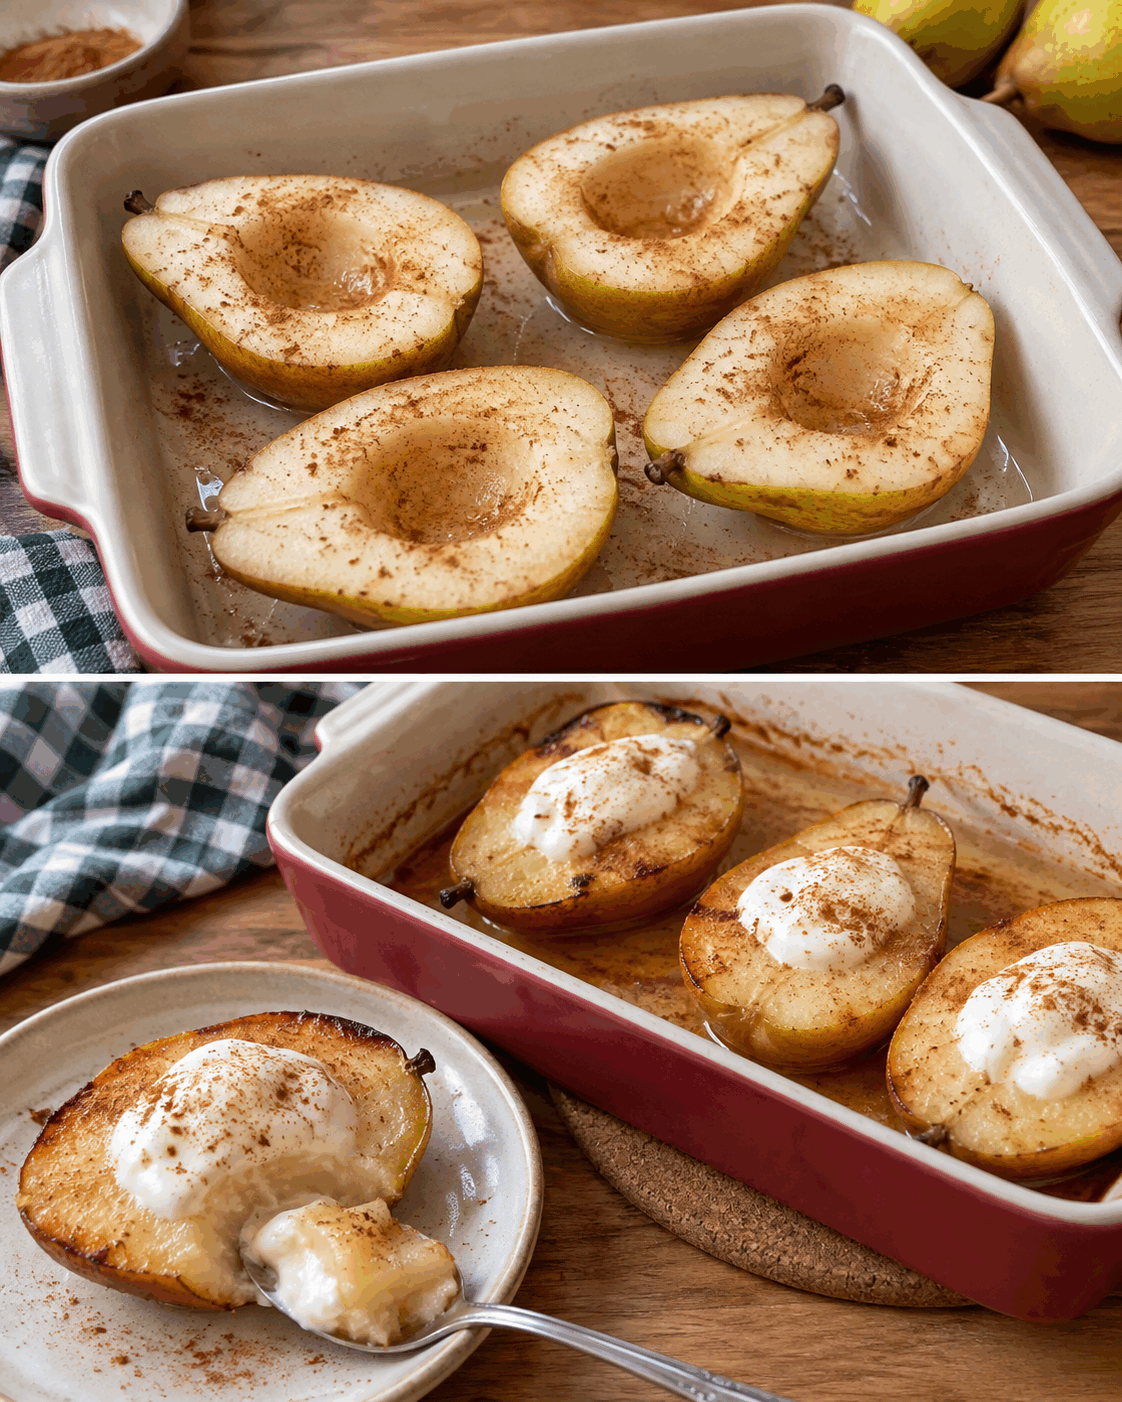
Tender baked pears with plain yogurt and cinnamon, with no added sugar
Pears, plain yogurt and a little cinnamon make a simple dessert with a tender middle and a cool spoonful on top. The pears bake first, with a small amount of water in the dish. The yogurt goes on after baking, once the fruit has rested briefly. There is no added sugar, honey or syrup in this version.
You do not need pastry, a mixer or a thick sauce. Two pears make four halves, which are easy to serve individually. Choose ripe but firm fruit so the halves soften without falling apart. The flavor comes from the pears, without a sugary glaze.
Ingredients and equipment
For four pear halves, use 2 ripe but firm pears, about 400 g in total before trimming, 4 tablespoons plain unsweetened yogurt, one-quarter teaspoon ground cinnamon and 2 tablespoons water. The yogurt is about 60 g if you prefer weighing it, but an ordinary level tablespoon makes this a straightforward recipe without a long ingredient list.
Choose a small, shallow ovenproof dish that holds the four halves comfortably. You will also need a small spoon for removing the cores, a knife, oven gloves and a heat-safe resting place. Preparation takes about 10 minutes, baking 25–35 minutes at 350°F or 180°C, and resting another 5–10 minutes before the yogurt is added.
Read the yogurt label if keeping the dessert free of added sugar matters to you. Plain flavored-looking packaging does not always mean unsweetened yogurt. The pears and milk naturally contain sugars, so this is not a dessert with no sugars at all. The description simply means that no sugar, honey, syrup or sweetened topping is added to the recipe.
How to bake the pears
1. Heat the oven to 350°F or 180°C, using conventional heat. Wash and dry the pears. Cut each one in half from stem to base and remove the core with a small spoon. Keep the skin on if it is sound and pleasant to eat. Cut with a flat side supported on the board, not in your hand.
2. Arrange the four halves cut side up in the ovenproof dish. They should sit without balancing on top of one another. If a half rocks badly, use a dish that supports it better rather than cutting away much fruit. Keep the little hollow left by the core; it will hold some yogurt later, after the pears have baked.
3. Sprinkle the cinnamon lightly over the cut surfaces. Add the 2 tablespoons of water to the bottom of the dish, not as a deep bath around the pears. This small amount helps prevent the base from drying out early in baking. Do not add honey or sugar for color, because that would change the no-added-sugar version described here.
4. Set the dish on the middle oven rack and bake for 25–35 minutes. Start checking near the shorter time if the pears are small or very ripe. A knife should enter the thick part with little resistance. The fruit should be tender but still hold its shape. Variety and ripeness affect timing, so check texture too.
5. Remove the dish with oven gloves and place it on a stable heat-safe surface. Let the pears rest for 5–10 minutes. The dish and the fruit hold heat, even after visible steam disappears. Do not carry the hot dish one-handed or reach across it for the yogurt. Set up plates nearby so serving can be done calmly.
6. Add 1 tablespoon of plain yogurt to each pear half after the brief rest. Serve one or two halves per person, according to appetite, with a spoon. The yogurt should remain a fresh topping rather than a baked layer. Show the tender fruit when cutting into a portion; no extra sauce or decorative sugar is needed for serving.

Simple ways to get a good texture
Firm ripe pears are easier to handle than very soft ones. A hard unripe pear may stay firm longer and taste less sweet, while an overripe pear can collapse before the others soften. Use two fruits of similar ripeness when possible. You are aiming for spoon-tender halves, not a smooth puree or a crisp baked shell.
Check the bottom of the dish toward the end of baking. If it has dried completely and the fruit still needs time, add a small splash of hot water carefully to the dish, avoiding temperature changes unsuitable for the bakeware. Do not pour cold water into a very hot glass dish. Follow the dish maker’s instructions about heat and liquids.
The yogurt is added after cooking because the recipe is built around a cool topping on tender warm fruit. Baking it from the start would give a different texture and could cause separation. If you prefer the pears less warm, let your serving cool further before topping it. The fruit can be served pleasantly warm without being piping hot.
Serving and saving a portion
Serve in a shallow bowl or on a small plate that catches the juices. A spoon makes the tender fruit easier to eat without needing to hold the half still with a sharp knife. Cinnamon is only a light flavoring here, not a thick coating. The dessert should still taste mainly of pear and plain yogurt, with its natural sweetness.
If you are keeping some for later, refrigerate the cooled baked pears in a covered container and add fresh yogurt when serving. Eat them preferably within two days, observing the yogurt label as well. Do not leave the baked fruit and dairy topping sitting out for hours. Warm only the pear portion if desired, then add the yogurt afterward.
Frequently asked questions
Do I have to peel the pears?
No, not if the skin is sound and you enjoy eating it. Wash the fruit well and remove the core. The skin helps the halves hold together, although its texture varies with the variety. If you prefer peeling, handle the softer fruit gently and check earlier, since a peeled pear may need more support in the dish.
Can I add honey?
You can change a dessert to suit your taste, but honey is an added sugar. It is not included in this version. Try ripe pears first, because their natural sweetness may be enough. If you do add honey or a sweetened yogurt, describe your version accurately rather than keeping the original no-added-sugar claim after changing the ingredients.
Why are my pears still firm?
They may have been less ripe, larger or a firmer variety than expected. Continue baking gently and check the thickest area with a knife. Keep an eye on the small amount of liquid in the dish, following the bakeware instructions if you add more. Do not increase the heat sharply just to match a fixed number of minutes.
Can I bake the yogurt with the pears?
That would be a different preparation. Here, the pears bake on their own with cinnamon and a little water, then receive plain yogurt after a short rest. This keeps the topping fresh and avoids relying on how a particular yogurt behaves under heat. Follow this order for the warm-fruit and cool-yogurt result shown in the recipe.
Can I make only one pear?
Yes. Halve the ingredients and use a smaller suitable dish so the little amount of water does not spread too thinly. You will have two pear halves, with 1 tablespoon of yogurt for each. The baking time may be similar because the fruit size matters more than the number of halves, so check tenderness rather than halving the minutes.