Beautiful flower gate garden ideas from plastic bottles
Beautiful flower gate garden ideas from plastic bottles
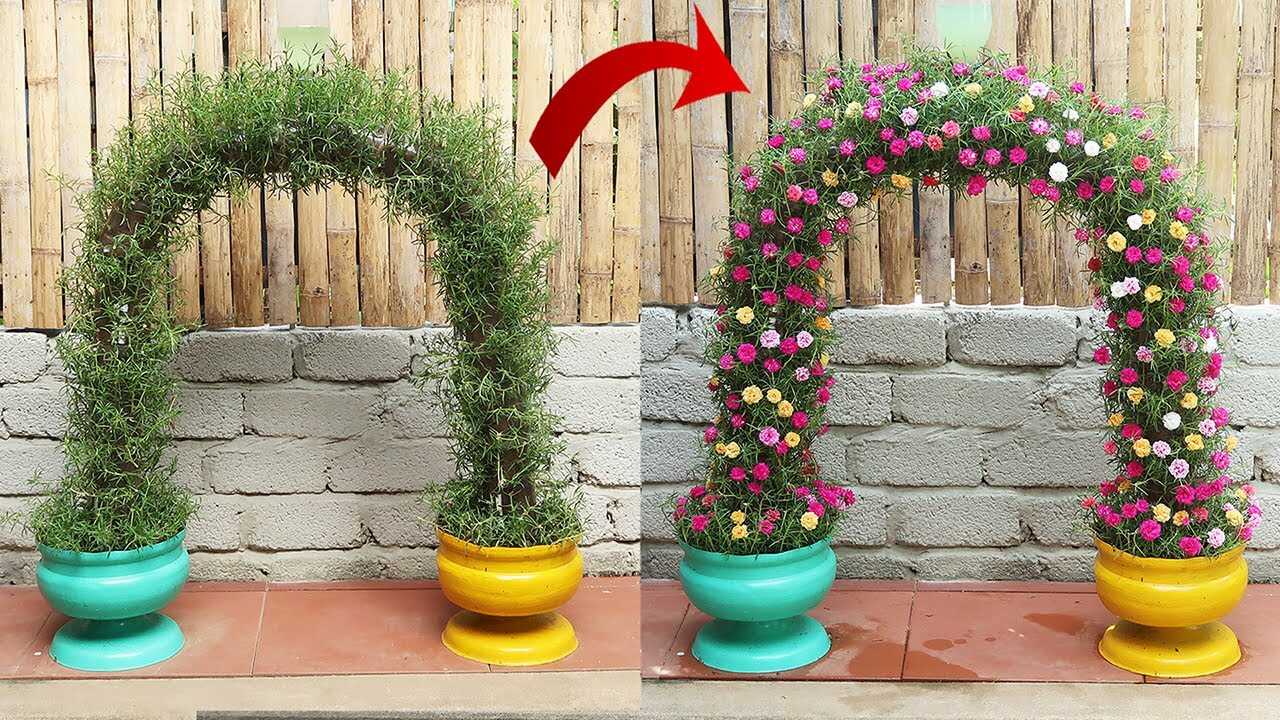
In the photo you can see a charming arched gate covered in dense, tiny, rose-like blooms and narrow, fleshy leaves — that plant is the sun-loving succulent annual commonly called moss rose (Portulaca). The arch is built from painted recycled containers (plastic bottles and tubs) and trained so the Portulaca cascades and fills the frame. This article shows exactly how to recreate that look using **plastic bottles as planters**, why Portulaca is ideal for the job, and a precise, seasonal care plan so your gate becomes a colorful curtain of flowers in 8–12 weeks.
Why use Portulaca and recycled plastic bottles?
Portulaca has fleshy, water-storing leaves and a natural trailing habit, so it tolerates shallow, well-drained containers and droughty conditions — perfect for cut plastic bottles. Its flowers open in full sun and are heat-tolerant, giving reliable color through warm months. Using plastic bottles makes a lightweight, inexpensive modular planting system that you can shape along a wire arch.
Materials and exact measurements
- Plastic bottles: 1.5–2 L PET bottles (or larger soda bottles). You will need about 12–18 bottles for a 1.5 m (5 ft) arch, spaced every 6–8 cm along the frame.
- Arch frame: 6 mm galvanized wire or poultry netting shaped into an arch 1.5–2 m long; anchor into two painted plastic tubs or recycled pots (one at each side).
- Soil mix: 60% good-quality potting soil, 30% coarse sand or perlite, 10% well-aged compost (by volume).
- Plants: Portulaca seedlings or rooted cuttings — 1 seedling per bottle (compact cultivars) or 2 very small seedlings for larger bottles.
- Tools & fixings: box cutter, electric drill or heated nail for drainage holes, zip ties or garden wire to attach bottles, diluted liquid fertilizer.
Step-by-step: make the bottle flower gate
1) Prepare bottles: cut each 1.5–2 L bottle horizontally to create a planting pot about 12–15 cm deep; leave the neck intact on the bottom half for rigidity. Drill 3–4 drainage holes in the base (3–4 mm each).
2) Paint or decorate (optional): if you want colored planters like the photo, use water-based acrylic or spray paint designed for plastic. Allow paint to dry fully before planting (24 hours).
3) Build the frame: shape your wire or mesh into an arch the desired height (about 1.6–1.8 m is comfortable). Secure ends into the two base pots/tubs filled with concrete or heavy soil to stabilize the arch.
4) Attach bottles: fix the bottles to the frame using zip ties or garden wire. Position bottles so the open top faces upward; space them 6–8 cm apart so plants will grow together and cover the frame.
5) Fill and plant: fill each bottle with the specified soil mix, leaving 2 cm from the rim. Plant one Portulaca seedling (or one cutting) per bottle, firming soil around roots. Water lightly to settle.
Watering, fertilising and seasonal schedule (precise doses)
- Watering: Use 200–300 ml of water per 1.5 L bottle at each watering. In spring/early autumn: water once per week. In hot summer (sustained temps over 28°C / 82°F): increase to 300–400 ml twice per week. Always let the top 2 cm of soil dry before next watering to avoid root rot.
- Fertiliser: During the active growing and flowering season apply a balanced liquid fertiliser diluted to 25% of the label strength (for example, if the label recommends 4 ml per litre, use 1 ml per litre). Feed every 3–4 weeks from first established growth until the end of bloom season.
- Light: Place the arch in full sun — a minimum of 6 hours direct sunlight daily. Portulaca opens its flowers in sun and will be sparse in shade.
Training and maintenance (practical tips)
– Pinch or trim young stems lightly in the first 3–4 weeks to encourage branching; a little early shaping helps faster coverage.
– As stems begin to spill over the bottles, tuck them into the mesh/arch and secure with soft plant ties. Portulaca roots readily at nodes; if you wish, press a trailing tip into fresh potting mix to root an extra plant.
– Deadheading is optional — many modern Portulaca keep flowering without it. If you see leggy growth, trim back 10–15% to stimulate new blooms.
Common mistakes to avoid
- Too much water or no drainage: Bottles must have multiple drainage holes. Overwatering causes fungal root rot in Portulaca — avoid soggy soil.
- Too much fertilizer: High nitrogen doses produce floppy foliage and fewer flowers. Always use the 25% dilution and follow the 3–4 week frequency.
- Insufficient sun: Placing the arch in shade reduces flowering and causes sparse coverage. Move the gate to a sunnier location if blooms are few.
- Overcrowding in a single bottle: One healthy seedling per 1.5–2 L bottle prevents competition and keeps soil from drying too slowly.
Timing and expected results
After planting in spring or early summer, expect initial root establishment in 2–4 weeks and visible spilling/training across the arch by 6–8 weeks. With regular sun, water and the fertiliser routine above, a full floral display typically develops in 8–12 weeks. This timeline is seasonal — planting late in the season may delay results until warmer weather returns.
Final inspiration and call to action
Using Portulaca in painted plastic-bottle planters is an eco-friendly way to turn waste into a living, blooming gate. The combination of the plant’s succulent drought tolerance and the lightweight modular bottles makes installation simple and low-maintenance. Try a small section first (6–8 bottles) to refine spacing and watering, then scale to a full arch. Share a photo of your flower gate once it blooms — you’ll be surprised how quickly those little sun-loving roses transform a plain entrance into a joyful, colorful welcome.