Easy Tips for propagating branches and leaves with sand in plastic bottles
Easy Tips for Propagating Branches and Leaves with Sand in Plastic Bottles
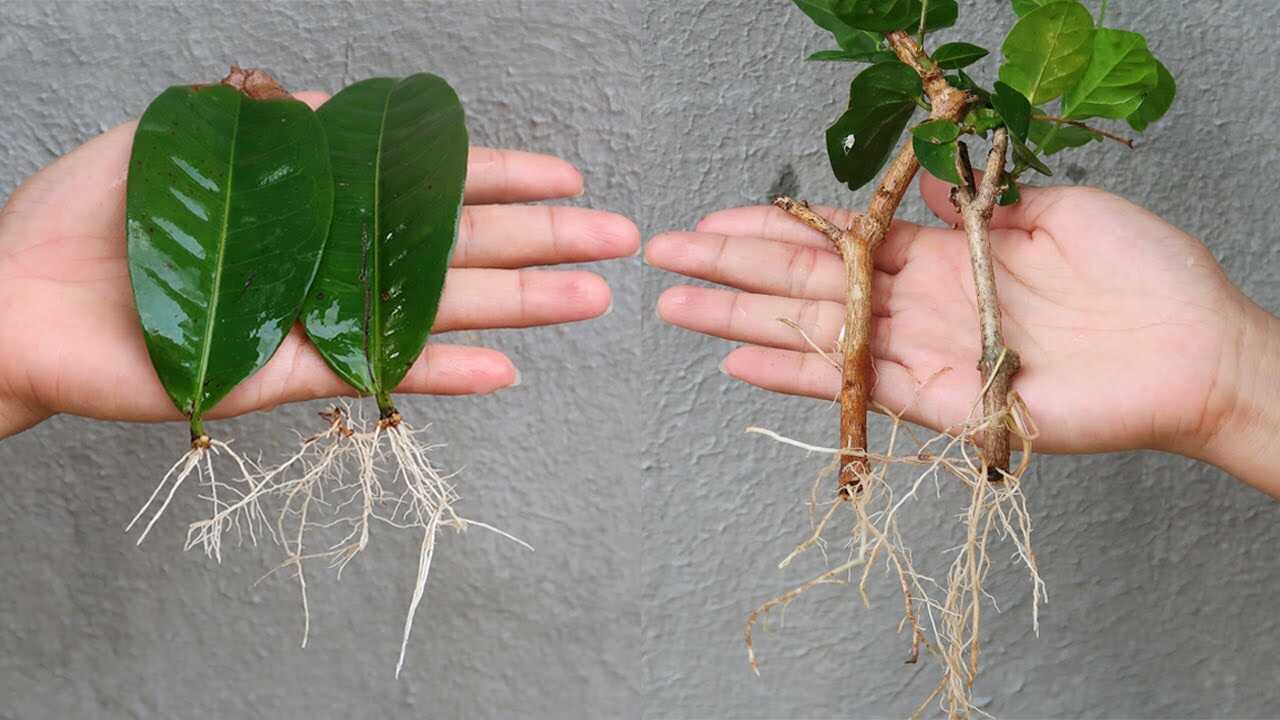
In the photo you can clearly see healthy, pale-white roots emerging from both leafy and woody cuttings — the visual proof that good rooting technique works. This guide explains how to reproduce those results at home using coarse, washed sand inside a recycled plastic bottle as a clean, well-aerated rooting medium.
Why sand and plastic bottles work (botanical basis)
Sand is inert and provides excellent drainage and aeration, which increases oxygen availability to developing root primordia and reduces the risk of fungal rot on soft cuttings. In a narrow, clear plastic bottle you create a mini-rooting station that holds humidity around the cutting while allowing you to monitor root progress. This approach complements — it does not replace — good light, watering and sanitation.
What you’ll need (materials and preparation)
- 2-L plastic bottle (or similar), washed and sanitized with a mild bleach solution (1 part bleach : 9 parts water), rinsed well.
- Coarse washed sand (river or builder’s sand) — avoid fine silica that compacts. Optionally mix 20% perlite for extra aeration.
- Sharp, clean pruning shears and rubbing alcohol for tool sterilizing.
- Rooting hormone (IBA powder) or natural willow water (optional).
- Spray bottle for misting and a measuring cup (200 ml).
Step-by-step method
- Cut the bottle: Cut a 2-L bottle horizontally about one third from the bottom so you have a stable base (bottom part) to hold the sand. Poke 3 small drainage holes (2–3 mm) in the lowest center to allow occasional draining.
- Sterilize the sand: Use pre-washed sand. Sanitize by pouring boiling water over the sand and letting it cool and drain, or bake in an oven at 180°F (≈82°C) for 30 minutes. Allow to cool before use.
- Fill the bottle: Add a 6 cm (2.5 in) layer of moist sand into the bottle base. For smaller cuttings use a 4–5 cm layer. The sand should be uniformly moist but not dripping.
- Prepare cuttings: Take semi-ripe to hardwood cuttings 6–12 cm long (or leaf cuttings where species allow). Remove lower leaves and make a clean bottom cut just below a node. Trim any damaged tissue.
- Optional rooting aid: Dip the basal 1–2 cm in powdered IBA (follow product label) — for many shrubs 1,000–3,000 ppm is typical — or soak the cutting base in willow water for 12–24 hours to boost rooting naturally.
- Plant the cutting: Insert the cutting so the lowest node is buried and the stem is supported. For woody stems bury 2–3 cm; for delicate leaf cuttings bury 0.5–1 cm. Space cuttings to avoid crowding.
- Initial watering: After planting, pour 200 ml of water evenly over the sand to moisten thoroughly. Allow excess to drain out the holes. Never leave the sand saturated.
- Create humidity: Use the top part of the bottle inverted as a mini-greenhouse lid, or loosely cover with a clear plastic bag. Ventilate every 3–4 days for 10–20 minutes to prevent fungal growth.
Watering and maintenance schedule (precise doses and timing)
Keep the sand slightly moist, not wet. For a 2-L bottle with a 6 cm sand bed:
- Initial soak: 200 ml when planting.
- Warm season (spring–summer): mist the cuttings with 30–50 ml (a few sprays) every 3 days and add 50 ml of water into the sand from the top once per week if it feels dry.
- Cool season (autumn–winter): mist every 5–7 days and add 50 ml of water every 10–14 days.
- Flush salts: every 2 weeks pour 150–200 ml through the sand and let drain to prevent salt buildup if you use any bottled water or fertilizer later.
Expected timeline for rooting
Rooting times vary by species and cutting type. Expect at least several weeks before substantial root systems form:
- Softwood cuttings: 4–6 weeks.
- Semi-hardwood cuttings: 6–12 weeks.
- Hardwood cuttings: 8–16 weeks.
Only transplant when you can see a network of healthy white roots like those in the image and when the roots can hold the plant upright in the potting mix.
Practical tips from experience
- Use clean tools: A sterile cut limits pathogens. Wipe shears with rubbing alcohol between cuts.
- Shade and bright light: Keep cuttings in bright, indirect light — avoid direct noon sun which dries them out or burns new tissue.
- Label your bottles: Note species and date; different plants root at different rates.
- Monitor roots visually: A clear plastic bottle lets you check root color — healthy roots are pale and white, brown slimy tissue indicates rot.
Common mistakes to avoid
- Overwatering: Keeping sand saturated suffocates developing roots and promotes fungal rot. Aim for moist, not wet.
- Compacted sand: Fine sand that compacts reduces oxygen. Use coarse, washed sand (or add perlite) to maintain air spaces.
- Planting too deep: Burying nodes or leaves beyond their natural position can prevent root initiation. Bury only the node/leaf base as directed above.
- Not ventilating: Never seal the bottle without occasional air exchange — trapped moisture will encourage mold.
- Fertilizing too early: Don’t feed cuttings until new roots are well established; young roots are sensitive to salts.
Conclusion — get rooting and share results
Using coarse sand in a recycled plastic bottle gives you a low-cost, visible, and well-draining way to encourage the healthy white roots shown in the photo. Follow the precise depths, watering volumes and timing above, treat rooting as one step of good plant care (light, sanitation, drainage), and expect results in several weeks. Try a few cuttings, record dates, and once you have a cluster of pale roots, transplant gently into a light potting mix. Happy propagating — and don’t forget to share your before-and-after photos!