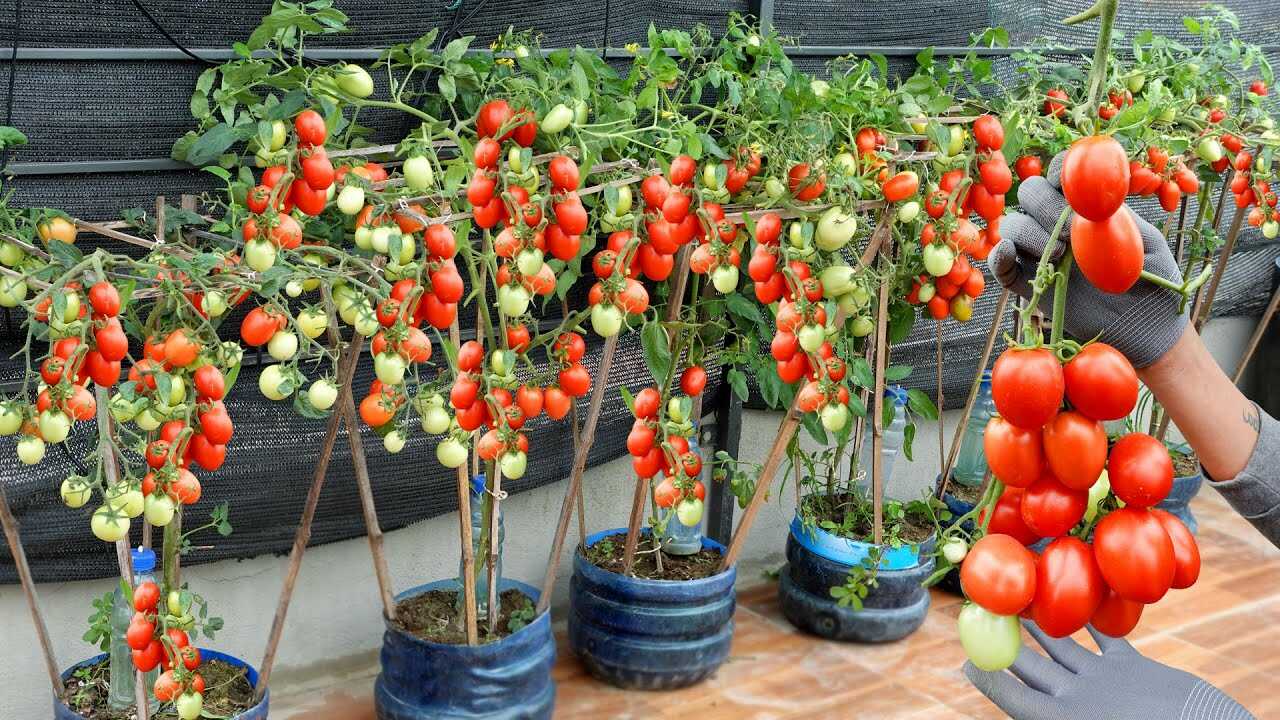
Growing super-fruitful Tomatoes with just a few plastic bottles
Growing super-fruitful Tomatoes with just a few plastic bottles
Introduction — what I see in the image and why it matters
The photo shows rows of tomato vines trained from repurposed blue plastic water bottles used as planters and reservoirs. These **plastic bottles** are the star: by turning them into self-watering containers and protective cloches you can give tomato roots steady moisture, better root-zone temperature control, and an easy way to grow productive plants in small spaces.
Why bottles work for tomatoes (and the real horticultural benefit)
Food-grade PET or HDPE water bottles are largely inert at normal outdoor temperatures and make practical mini-planters. The real, verifiable benefit: a properly built bottle **self-watering reservoir** supplies a consistent root moisture level. Consistent moisture is a proven factor in reducing blossom-end rot and fruit cracking because it stabilizes calcium and other nutrient uptake in tomatoes. Bottles also provide a compact, insulated volume that helps roots remain active during early and late season, improving fruit set over several weeks.
What you’ll need (visual match to the image)
- 10-litre (or 5–10 L) blue food-grade plastic water bottles (or similar large jugs)
- Sharp knife or small saw, drill or awl for holes
- Wicking material: cotton rope or old T-shirt strip (2 cm diameter, ~25 cm long)
- Quality potting mix, compost, and perlite/vermiculite
- Tomato seedlings (compact/determinate or patio varieties work best in bottle volumes)
- Thin bamboo stakes and soft ties for support
- A balanced soluble fertilizer and a potassium-rich feed for fruiting
Step-by-step: convert a bottle and plant a tomato
- Cut the bottle — Measure and cut the top third off the bottle (cut about 1/3 from the neck). The bottom 2/3 will be the reservoir and the top becomes the soil chamber when inverted.
- Create the reservoir and wick — Drill 4–6 small holes in the bottom of the inverted top piece to allow soil-to-wick contact. Thread the cotton wick through the bottle neck so one end sits in the reservoir and the other in the soil (wick length ~20–25 cm).
- Drainage and aeration — Poke 6–8 small holes in the reservoir base for overflow/drainage. Place a 1–2 cm layer of coarse material (broken pottery or gravel) in the reservoir bottom to keep the wick clear.
- Soil mix and fill — Use: 50% high-quality potting compost, 30% well-rotted compost, 20% perlite or coarse sand. For a 10 L bottle, fill the soil chamber with about 8–9 litres of this mix to give roots room.
- Transplant and stake — Plant a healthy seedling into the soil chamber. Insert a bamboo stake through the soil chamber to anchor the plant; tie loosely and train one main stem (single leader) as you see in the photo.
- Assemble — Fill the bottom reservoir with water until the wick is wet and the reservoir is ~50–70% full. Replace the inverted top (soil chamber) so the wick draws water up into the soil.
Feeding, watering and seasonal schedule (precise doses and frequency)
- Baseline watering: Keep the reservoir topped up so the wick stays moist. In active growth (spring–summer) expect to refill the 2–4 L reservoir about once every 7–14 days depending on temperature; in cooler shoulder seasons top up every 2–4 weeks.
- Fertilizer dose & frequency: Use a balanced soluble fertilizer (e.g., 10-10-10) at 1 level teaspoon (≈5 g) per 4 litres (1 gallon) of reservoir water. Apply this every 10–14 days during vegetative growth (spring). Once flowers set and fruit begins to form (summer), switch to a potassium-focused feed (e.g., 5-10-15) at the same rate: 1 teaspoon per 4 litres of reservoir every 10–14 days. In autumn reduce to one feed every 4 weeks.
- Calcium prevention tip: If your tap water is very soft or you see early blossom-end rot, add 1 teaspoon of ground eggshells per litre of potting mix at planting or use a calcium spray per product instructions. The consistent moisture from the reservoir helps calcium uptake, but steady feeding and watering are essential over several weeks to correct deficiencies.
Practical tips from experience
- Choose the right variety: Compact or determinate and patio tomatoes suit a single bottle (8–12 L). Larger indeterminate types need several bottles joined or a bigger container.
- Shade the bottle body: PET degrades with UV and heats up. Wrap the reservoir in fabric or paint it white/opaque to reduce heat stress and prolong bottle life.
- Prune and train: Remove lower leaves and grow a single leader, pinching side suckers up to the first inflorescence to direct energy into fruit set (do this gradually over several weeks).
- Pollination: In sheltered spots, gently shake stems or use a soft brush on flower trusses each morning for 2–3 weeks to improve fruit set.
Common mistakes to avoid (real botanical reasons)
- Too small a soil volume: Tomatoes need root volume. Using tiny bottles without at least 8 L of mix causes stunted growth and poor fruiting.
- Overfeeding nitrogen: Excess nitrogen leads to lush foliage and few fruits. Switch to a potassium-rich feed once fruiting begins.
- Allowing the reservoir to dry out completely: That interrupts calcium uptake and can cause blossom-end rot. Keep the wick moist; check reservoirs weekly in warm weather.
- Direct, all-day intense sun on plain PET: Bare plastic can overheat roots and accelerate UV breakdown. Provide partial shading to the bottle body during hot afternoons.
Timeline: when to expect results
After setting up bottles and planting healthy seedlings, you should see steady vegetative growth in 2–4 weeks and improved **fruit set and consistency** within 4–8 weeks if you maintain the reservoir, feed as directed, and provide good light and support. Peak production typically runs through the summer months; with proper care the bottle system will sustain productivity over several months.
Conclusion — a simple, low-cost way to boost fruitfulness
Repurposed blue plastic bottles, when converted into self-watering planters and used with a well-draining soil mix and a clear feeding schedule, deliver the steady root moisture and temperature buffering tomatoes need to set more fruit. This is not a miracle — it’s a practical, verifiable method to complement good light, staking, pruning and feeding. Try two bottles first: plant one compact tomato, follow the feed schedule for 6–8 weeks, and compare the harvest. Share your results and tweak bottle size or soil volume to match your variety.