Growing Tomatoes on the balcony and the unexpected happened
Growing Tomatoes on the Balcony and the Unexpected Happened
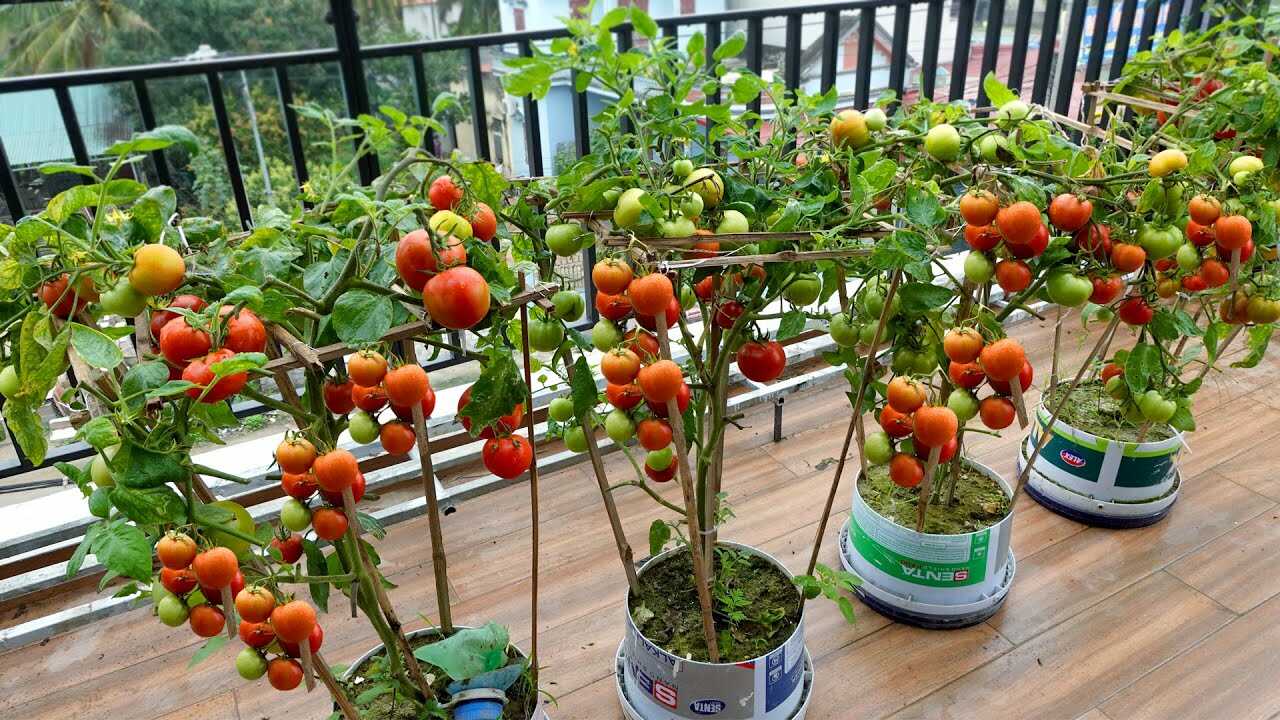
In the photo you can see a row of healthy tomato plants grown in repurposed plastic buckets on a balcony — white printed buckets filled with soil, each with a bamboo stake and a simple wooden trellis. This article focuses on that exact, visible element: using **repurposed plastic buckets** as container planters for balcony tomatoes and how to convert them into reliable, productive homes for your plants.
Why repurposed buckets work for balcony tomatoes
Buckets give you consistent **root volume**, moveable containers for sun exposure, and enough depth for indeterminate and determinate tomato roots when sized correctly. Properly prepared, a bucket provides good drainage, thermal buffering on a balcony, and an affordable container option. But there are botanical reasons for doing it right: tomatoes need a minimum soil volume for stable fruiting, steady moisture without waterlogging, and a balanced nutrient supply — all of which a corrected bucket setup can deliver.
Step-by-step: convert a plastic bucket into a tomato planter
- Choose and clean the bucket: Use food-grade or visibly clean plastic buckets (10–15 L is ideal for one tomato plant). If the bucket previously held paint or chemicals, discard it for edibles or line the interior with a food-safe plastic liner. Wash thoroughly with hot soapy water, rinse, and dry.
- Make drainage holes: Drill or punch 6–8 holes around the base, each about 8–10 mm (5/16–3/8 inch) diameter. Add 2–3 small holes in the center of the base for uniform drainage. Elevate the bucket on small feet or pot saucer pegs so water can escape freely.
- Prepare the soil mix (for a 10 L bucket): Mix 6 L premium potting mix + 3 L well-rotted compost + 1 L coarse perlite or grit. This ~60/30/10 ratio gives good moisture retention, nutrients and aeration. Fill the bucket leaving ~3–5 cm from the rim for watering.
- Planting and initial fertilizer: At planting, blend 30–50 g of a slow-release balanced fertilizer (e.g., 14-14-14) into the soil in a 10 L bucket — about 2–3 tablespoons (use the product’s label as primary guidance). Plant a single tomato seedling per 10–15 L bucket; larger indeterminate varieties do better in 15–20 L containers.
- Support and mulching: Insert a sturdy stake (bamboo or metal) at planting. Add a 2–3 cm organic mulch layer (composted bark or straw) to reduce evaporation and protect roots from temperature swings common on balconies.
Feeding, watering and seasonal schedule
Water deeply until water runs out of the drainage holes, then allow the top 2–3 cm of soil to dry before the next full watering. On hot sunny balconies this often means daily watering in midsummer; in cooler months every 3–4 days may suffice. Always check moisture rather than following a strict clock.
Fertilize as a complement to soil mix: use a water-soluble tomato fertilizer at label strength every 10–14 days during the main growing season, or use liquid fish emulsion at 15 ml (1 tablespoon) per 4 L (1 gallon) water every 7–10 days. When fruiting begins, give a potassium boost (e.g., 1 teaspoon ~5 g potassium sulfate per plant as a side-dress) every 3–4 weeks to support ripening. Expect to see measurable improvement in vigor and fruit set within several weeks after adjusting soil and feeding.
Practical tips from real balcony growers
- Place buckets where they get at least 6–8 hours of **direct sun**; rotate them periodically for even ripening.
- Keep buckets elevated a few centimetres to prevent waterlogging and to improve airflow under the container.
- Prune lower leaves and suckers on indeterminate varieties to reduce disease risk and focus energy on fruiting.
- If wind is an issue on your balcony, secure stakes to the railing or use heavier saucers filled with gravel to prevent tipping.
Common mistakes to avoid
- Using garden soil. It compacts in buckets and reduces drainage — always use a premium potting mix blended as described.
- Skipping drainage. Insufficient holes or blocked holes cause root rot and sudden decline.
- Using contaminated buckets. Paint or chemical residues can leach into soil; line or avoid such buckets for edibles.
- Overfertilizing with high-nitrogen feeds. Too much nitrogen produces lush foliage at the expense of fruit — follow recommended rates and reduce nitrogen when flowering begins.
What to expect and how long it takes
Tomatoes grown in properly prepped buckets usually show improved leaf health and steadier fruit production within 3–6 weeks after repotting or correcting the container system. Full cycles from transplant to ripe fruit commonly take several weeks to months depending on variety — be patient and maintain the basics: light, water, drainage and balanced feeding.
Conclusion — try it on your balcony
Repurposed plastic buckets can be an inexpensive, effective solution for balcony tomato growing when converted thoughtfully: clean them, add adequate drainage, use a light, nutrient-rich soil mix, and follow a regular feeding and watering schedule. This simple change to your containers can be the unexpected factor that turns sporadic fruiting into a steady harvest. Try converting one bucket this season and observe the change over several weeks — then scale up when you’re ready. Happy balcony gardening!