How to grow potatoes in old plastic paint buckets for beginners
How to grow potatoes in old plastic paint buckets for beginners
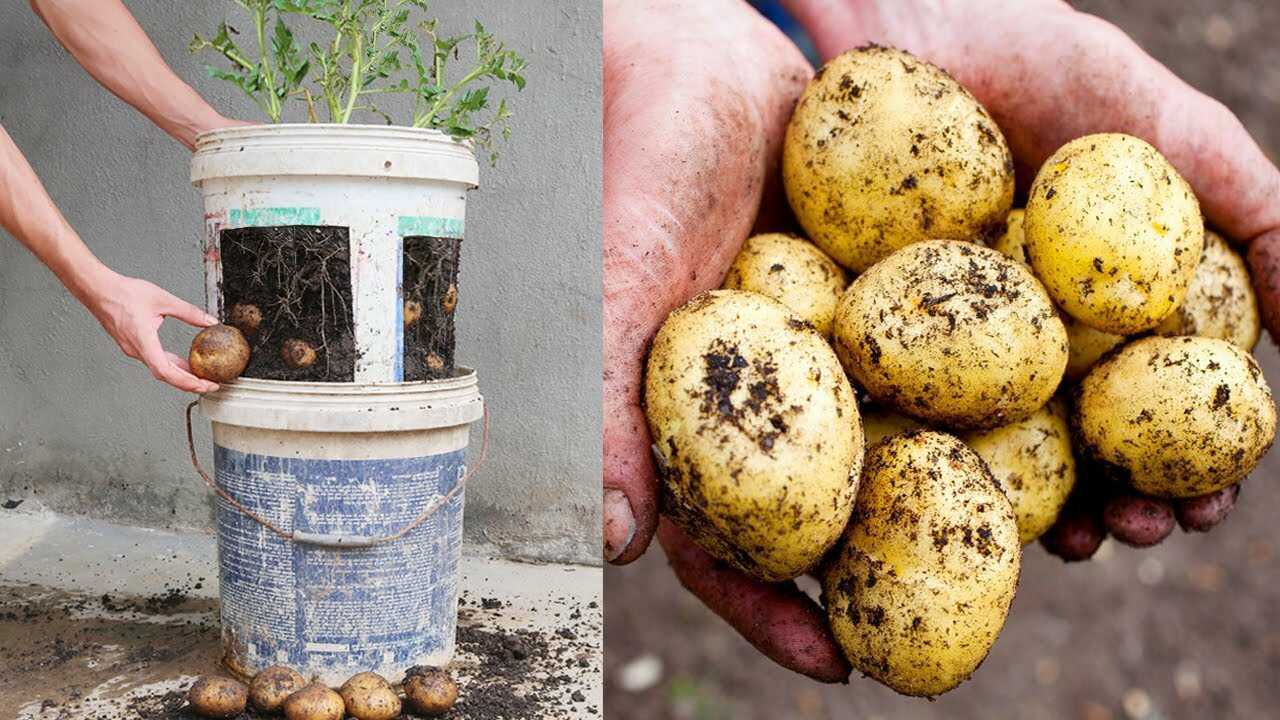
In the photo you can see stacked, **white plastic paint buckets** with cut-out windows used as containers and a handful of freshly harvested **potatoes**. This method is perfect for small spaces: repurposed 5‑gallon buckets give you a controlled, deep bed for tuber development and the cut-away window lets you check and harvest without destroying the plant.
Why use old plastic paint buckets?
Five-gallon buckets are sturdy, inexpensive, and widely available. When cleaned and prepared correctly they provide a container with enough volume and insulation for healthy tuber formation. A deep, loose growing medium inside the bucket encourages the potato tubers to develop freely — potatoes form best in **well-draining, loose soil** with steady moisture and good aeration.
What you need (materials and WHY)
- One clean 5‑gallon (≈19 L) plastic bucket per plant, or two stacked 5‑gallon buckets (≈38 L total) for maincrop varieties — more volume = larger yields.
- Seed potatoes (certified disease-free) — supermarket potatoes are often treated; certified seed decreases risk of disease.
- Potting mix: a free-draining blend (see recipe below) so tubers don’t sit in water and rot.
- Compost or well-rotted manure to supply slow-release nutrients and beneficial microbes.
- Hand drill or spade to make drainage holes; a saw or box cutter to cut a side window for easy harvest (optional but shown in the image).
Step-by-step: prepare buckets and plant
- Clean the bucket thoroughly. If it held water-based paint, wash with warm soapy water and rinse three times. Do NOT use buckets that contained solvents, oil-based paints, pesticides, or other toxic chemicals.
- Make drainage holes. Drill 6–8 holes (½ inch / 12 mm) evenly across the bucket bottom to ensure free drainage.
- Optional: cut a side window. As in the photo, cut a 4–6 inch (10–15 cm) window near the middle of the bucket and leave a removable flap or lid above. This lets you inspect tubers and harvest small potatoes without digging up the whole plant.
- Mix your soil (simple recipe). Combine: 50% good-quality potting soil, 30% compost, 20% coarse perlite or horticultural sand. This gives a **loose, well-draining medium** that holds moisture without compaction.
- Fill base layer. Add 3–4 inches (7–10 cm) of the mix to the bottom of the bucket.
- Prepare seed potatoes. Cut larger seed potatoes into pieces ~40–60 g (1.5–2 oz) each with at least one or two eyes. Let cut surfaces dry and callous for 24–48 hours to reduce rot risk (called “chitting”).
- Plant. Place one seed piece on the soil, eye-side up. Cover with 3–4 inches (7–10 cm) of mix. For larger two-bucket setups you can plant two seed pieces spaced apart in the upper bucket if volume allows.
Ongoing care: watering, feeding and hilling
- Watering: Keep the soil evenly moist but not soggy. For a single 5‑gallon bucket expect to water until water runs from the drainage holes — typically about 1–2 liters (0.3–0.6 US gallons) each irrigation in warm weather. In hot conditions water every 2–3 days; in cooler weather every 4–7 days. The rule: water when the top 2 inches (5 cm) feel slightly dry.
- Hilling (layering) — key to bigger yields. When shoots reach 6–8 inches (15–20 cm), add another 3–4 inches (7–10 cm) of mix to bury the stems leaving the top 4 inches (10 cm) of bucket empty. Repeat every 2–3 weeks as the plant grows until the bucket is nearly full. This encourages the plant to produce more tubers along the buried stem.
- Feeding: At planting mix in 2 cups (≈480 ml) of finished compost. Feed liquid balanced fertilizer at half strength every 3–4 weeks until flowering. After flowers appear, reduce nitrogen-rich feeding — tuber formation benefits from steady potassium and phosphorus, not excess nitrogen which promotes foliage over tubers.
- Sunlight & temperature: Potatoes prefer full sun (at least 6 hours daily). Ideal soil temperatures are 50–70°F (10–21°C) for growth; extremes will slow tuber set.
When to harvest (consistent timeline)
Expect new “baby” potatoes in about 10–12 weeks after planting for early varieties and maincrop harvests at 16–20 weeks, depending on the variety. Use the side window to check tuber size gradually and harvest selectively by feeling for firm, well-sized tubers. For final harvest, stop watering 7–10 days before to toughen skins.
Harvest tips
- Open the side access flap and gently feel for tubers — small ones can be removed without disturbing the plant.
- For full harvest, empty the bucket or pull back soil from the top down and collect tubers by hand to avoid cutting them.
- Brush off excess soil, cure in a cool, dark, dry spot for a few days, then store in a cool, humid, dark place.
Common mistakes to avoid
- Using contaminated buckets. Buckets that held solvents or oil-based paint can transfer toxins; only use thoroughly cleaned buckets from non-toxic contents.
- Poor drainage. Not drilling enough holes or using compacted soil leads to rot and fungal disease.
- Overwatering. Constantly waterlogged soil causes tuber rot. Let the top few inches dry slightly between waterings.
- Too much nitrogen. Heavy nitrogen feeds produce lush foliage but few tubers. Reduce nitrogen once plants flower.
- Ignoring hilling. Failure to hill limits tuber number and size — add soil in stages as stems grow.
- Planting untreated supermarket potatoes. They may be treated with sprout inhibitors or carry disease. Use certified seed potatoes where possible.
Quick troubleshooting
- If leaves yellow and collapse before flowering: check for overwatering and poor drainage — reduce irrigation and improve aeration.
- If foliage is lush but few tubers: cut back on nitrogen and continue hilling to encourage tuber set.
- If you see small round holes or stunted plants: inspect for pests (slugs, wireworm) and remove affected tubers; use physical barriers and clean soil.
Conclusion — repurpose, plant, enjoy
Growing potatoes in old plastic paint buckets is a practical, space-saving way to produce your own tubers. With clean buckets, a loose soil mix, regular hilling, and consistent watering you can expect a reliable harvest in several weeks (10–20 weeks depending on variety). Start with one bucket, follow the steps above, and scale up as you gain confidence. Happy planting — dig in and enjoy your first bucket-grown potatoes!