Just Rice! This Little-Known Trick Makes Rose Cuttings Root Fast
Just Rice! This Little-Known Trick Makes Rose Cuttings Root Fast
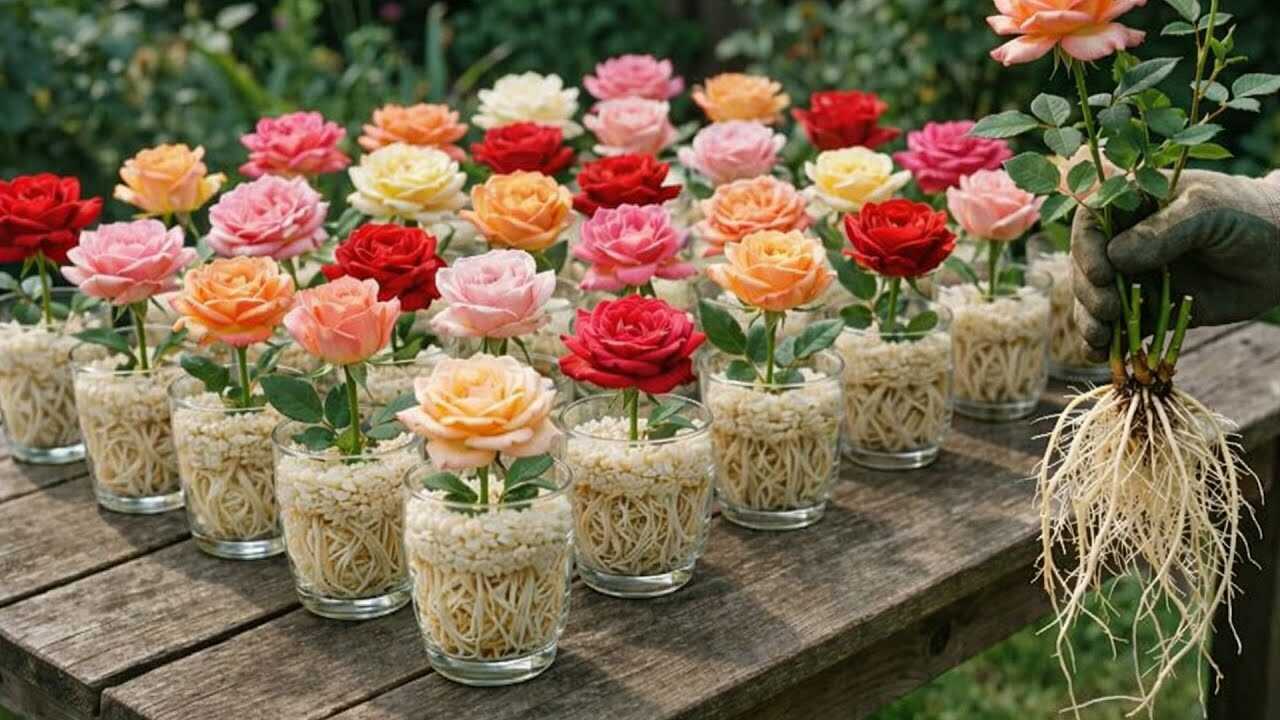
Look at the photo: dozens of rose cuttings standing upright in small clear glasses packed with pale, uncooked **white rice**. That rice — its color, grainy texture and compacting ability — is the star of this trick. Used correctly, **uncooked white rice** creates a stable, humid micro-environment and physical support that helps rose cuttings form roots reliably over several weeks.
Why rice works (brief, factual)
Uncooked white rice is a sterile, absorbent granular medium that: provides gentle physical support around the stem, wicks and holds moisture near the cutting base, and supplies tiny amounts of soluble carbohydrates and trace minerals when rice is briefly soaked (rice water). Those properties help maintain the high-humidity, low-stress conditions young cuttings need while roots develop. This technique complements — it does not replace — good basic care (light, temperature, clean tools, and drainage).
Materials (exact)
- Uncooked white rice (long- or short-grain), washed and air-dried — about 120–150 g per 200–250 ml glass.
- Small clear glass or jar (200–300 ml) so you can monitor roots.
- Sterile pruning shears or a sharp knife.
- Spray bottle for misting.
- Optional: powdered rooting hormone (follow product label; typical IBA powders are sold at 0.1–0.8% concentrations).
- Clean water for rinsing rice and for a shallow moisture reservoir.
Step-by-step: how to root rose cuttings in rice
- Take cuttings in spring or early summer when stems are semi-hardwood. Cut 10–15 cm (4–6 in) sections with 3–4 nodes. Make a clean 45° cut just below a node.
- Remove the bottom 2–3 leaflets and any flowers. Leave 2–3 leaflets at the top to reduce transpiration.
- If you use a rooting hormone, dip the base for 2–5 seconds in the powder per the product instructions; tap off excess. This is optional but speeds rooting in many rose varieties.
- Rinse the rice under cold water and spread it on a clean tray to air-dry for 10–15 minutes — you want it clean but not soaked. Pour about 120–150 g of rice into a 200–250 ml glass (fill roughly two-thirds).
- Press down to create a stable bed, then make a small hole with your finger about 3–4 cm deep. Insert the cutting so the lowest node is surrounded by rice; the rice should support the stem but not crush it.
- Add a tiny reservoir of water: pour 1–2 tablespoons (15–30 ml) of water into the bottom so the lowest grains are just damp. You want **moist** rice, not soggy. Alternatively, mist the rice until evenly damp.
- Place glasses in bright, indirect light at 18–24°C (65–75°F). Mist the cutting and rice every 2–3 days in warm seasons; reduce to every 4–7 days in cool weather. Keep rice lightly damp — never waterlogged.
- Check weekly through the glass. Expect root initials and steady development after a minimum of 4–8 weeks. Replace rice every 3 weeks: gently lift the cutting, discard old rice, rinse the cutting briefly, and repack with fresh clean rice to prevent mold buildup.
- Transplant when roots are about 5–7 cm (2–3 in) long. Gently wash off rice and plant into a well-draining potting mix. Harden off for 7–10 days before moving fully outdoors.
Practical tips from experience
- Use only white rice, not brown rice — brown rice contains more oils and microbes and molds faster.
- The clear glass is intentional: watching root progress lets you remove failing cuttings early and limits time in rice to avoid decay.
- If you want a gentle feed, use diluted rice soak-water (pour 1 part rice-soak water to 10 parts fresh water) as a foliar or base spray once every 2–4 weeks while rooting. Do not replace regular moisture management with this.
- Keep good air circulation around the tops of cuttings to prevent fungal leaf problems; rice provides humidity at the base, not a sealed, stagnant environment.
Common mistakes to avoid (real horticultural errors)
- Using cooked rice — it rots, smells, attracts pests and kills cuttings.
- Letting the rice become waterlogged — anaerobic conditions cause stem rot; keep rice moist, not saturated.
- Using brown or old rice — higher microbial load and rancid oils increase mold risk.
- Packing rice too tightly — roots need tiny air pockets; compacting prevents oxygen access to new roots.
- Neglecting to replace rice periodically — stagnant rice can develop mold or bacteria; fresh rice maintains a cleaner micro-environment.
When you’ll see results
This method requires patience: expect meaningful root development in about 4–8 weeks. Keep to the watering and rice-replacement routine above; rushing by overwatering or leaving cuttings in poor conditions lengthens the timeline. Once roots reach 5–7 cm and look healthy and white, move to potting mix.
Conclusion — try this rice trick today
The simple visual in the image shows why this works: rice cradles the stem, holds gentle moisture, and lets you monitor roots through glass. It’s an affordable, low-tech option to support rose cuttings alongside usual care — clean cuts, indirect light, consistent warmth and hygiene. Try it with a small batch, follow the steps and timing above, and share your results after 4–8 weeks. Happy rooting — and don’t forget to swap the rice on schedule!