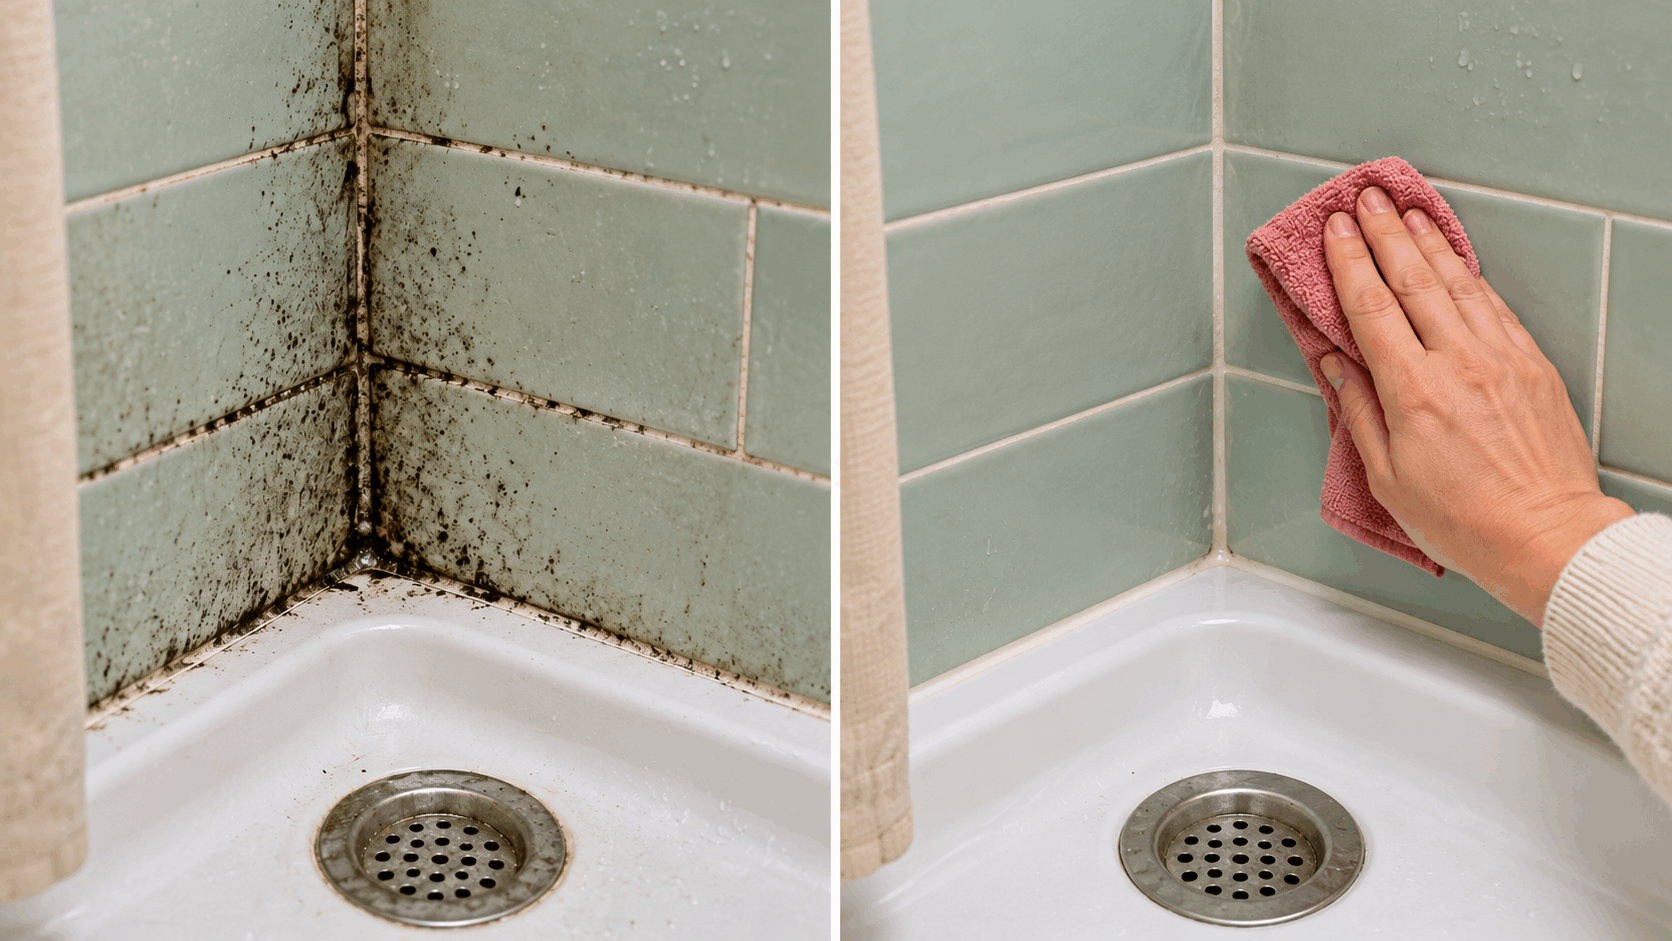
Mold-stained silicone: how to approach the problem
Mold staining on silicone should prompt a check of moisture and sealant condition before any attempt to whiten the surface. A visible mark may be superficial, but damaged or deeply affected sealant can require replacement. Cleaning should address an appropriate small surface while the underlying moisture problem is corrected.
Check adhesion as well as color
Inspect the edges of the silicone where it meets the surrounding surfaces. Gaps, peeling, or softness can matter more than how white the joint appears after cleaning. Water may continue reaching an area that cannot be seen from the front.
A failed joint needs an appropriate repair plan. Do not place a new bead directly over damp, dirty, or moldy material. After a suitable small cleanup, dry thoroughly and monitor the location. A quick return of staining is a reason to investigate, not simply repeat stronger chemistry.
Useful cleaning starts with a distinction: is the visible problem removable soil, or has the material itself changed? More pressure or a stronger product does not solve every situation. The following approach helps you identify the cause, choose a compatible method, and assess the result without applying a succession of unrelated household mixtures.
Identify the material and the deposit
Distinguish silicone sealant from cement grout, epoxy grout, and tile. Inspect for gaps, peeling edges, cracks, and signs of a leak. Color alone cannot identify the mold species or establish how far the problem extends.
Inspect the area in good light and note where the change is most visible. A uniform film behaves differently from a localized stain. When possible, compare with a protected, lightly used area. This helps establish whether the original appearance is hidden by a deposit or whether the finish itself has changed over time.
Read the care label or manufacturer’s instructions. Materials that look alike can require different treatment. A general household suggestion does not replace those instructions. If the finish is unknown, start with the mildest expressly suitable option and avoid experimenting across the whole area with concentrated acids, solvents, or coarse abrasives.
Preparation and equipment
Use a surface-compatible cleaning method and the protective equipment appropriate to the task. Keep children and pets away from the work area. Seek professional guidance for extensive growth, hidden damage, or circumstances that make exposure unsuitable.
Set out clean tools and clear a working area before beginning. A heavily soiled cloth can spread residue rather than remove it. Keep a second clean cloth or the appropriate means of removing product residue available. Protect neighboring materials if drips or loosened soil could reach them. This also prevents unnecessary interruptions while your hands are wet.
Work on appliances only in the safe condition specified in their instructions. Hot parts must cool, and water must not enter electrical components. Do not open housings or loosen structural connections merely to reach a difficult spot. A user-accessible cleaning area is different from a compartment intended for professional servicing.
The method, step by step
Investigate and correct the moisture source. For a small suitable hard surface, clean with a compatible detergent method and dry completely. Follow product directions and exposure precautions. Have deeply affected or failing silicone assessed for proper removal and replacement rather than applying a fresh bead over the problem.
Follow the sequence and work in manageable sections. This makes it easier to observe how the material responds. Wetting a large area immediately can make contact time difficult to control. If a product is used, follow its dilution, application, and removal instructions rather than increasing the concentration because the deposit looks old.
Longer contact is not automatically more effective. A product that dries in place can leave marks of its own. Greater pressure can also damage a surface without improving removal. If a mild compatible pass helps, repeat it carefully where necessary. If nothing changes, reconsider the cause before escalating the treatment.
What to avoid
Do not dry-brush mold, mix bleach with acids or ammonia, or coat a dirty damp joint with new sealant. Strong fragrance and essential oils do not establish that a moisture problem has been solved.
Do not combine cleaning products casually. In particular, chlorine bleach must not be mixed with acids, vinegar, or ammonia. Do not use an unidentified mixture from an unlabeled bottle. Ventilate as appropriate and follow the protective measures on the label. A familiar smell or the word natural does not establish compatibility with the material.
Do not switch immediately to another chemical while residue from the first remains. Remove it in the specified way and decide whether another step is needed. Additional products can make the result harder to interpret without improving it. Routine care benefits from a clear, repeatable process and quantities that can be measured.
Make a small test meaningful
Where the care instructions allow it, test a new compatible approach in an inconspicuous area. Compare only after it has dried fully. A wet surface may appear darker or shinier and suggest a temporary success. Check color, sheen, roughness, and effects on nearby materials, rather than looking only at the original mark.
Stop if color transfers from a finish, the material swells, or an unexpected change appears. Do not try to reverse it immediately with another home remedy. Remove the product according to its instructions and seek appropriate advice for delicate or valuable items. Preserving the material matters more than eliminating every visible trace at any cost.
Understand the promise behind the trick
The EPA mold cleanup guidance centers moisture control, appropriate cleaning, and thorough drying. A lightened stain is not proof that a hidden leak or damaged joint has been repaired.
A brief before-and-after photograph does not reveal the entire process. Lighting, moisture, and viewing angle all affect appearance. Compare your own result under similar conditions. This helps distinguish actual removal from a temporary wet shine. A repeatable improvement is more useful than an impressive appearance that disappears when the surface dries.
Cleaning and restoration are different tasks. A small remaining color difference may be preferable to a damaged coating after aggressive treatment. If the material itself has deteriorated, repair or replacement may be appropriate. Applying more cleaner cannot rebuild a worn finish, close a crack, or restore missing material.
Check the result and maintain it
Reduce lingering water after showers, use appropriate ventilation, and monitor the same locations. Rapid recurrence, ongoing leaks, or widespread growth deserve further assessment.
Look for residue and retained moisture in less visible places. Return the item to use only when its required drying and safety conditions are met. If user-removable parts were taken out, confirm that they fit correctly afterward. Do not force a connection that is not seating properly or improvise a permanent attachment to finish the task.
Adjust the frequency to actual use. A lightly used item does not need the same routine as one exposed every day. Brief suitable maintenance often prevents stubborn buildup. Daily aggressive treatment may instead be unnecessary. Notice when the problem returns and what activity or condition came before it, so prevention addresses a real cause.
Frequently asked questions
Does the item have to look brand-new? Not necessarily. Aging, scratches, and changes to finishes cannot always be reversed by cleaning. A clean, intact condition is the sensible goal. Judge success by that standard rather than solely by a strongly edited comparison image or a photograph taken while the surface was still wet.
Can another cleaner already in the cupboard be used? Only if it suits the specific material and purpose. Similar color or fragrance is not enough. Check the label and care guidance. If compatibility is uncertain, waiting for a suitable product is preferable to testing an unknown one across the entire area.
Why does the problem return quickly? Some deposit may remain, but often the underlying condition continues: moisture, use, or product residue. Observe what reappears before changing products. A stronger concentration helps little when the same conditions recreate the problem. Maintenance should connect directly to the cause that you can identify.
Reduce unnecessary effort and product use
Prepare only the amount needed of a solution that the label allows you to dilute. More product can leave more residue to remove. Use a measuring tool when a dose is specified. Keep cleaners in their labeled original containers, away from food, children, and pets. Do not use beverage bottles even for temporary storage.
Care for the cleaning tools as well. Wash cloths according to their instructions and dry them completely. Replace damaged tools that could scratch or spread dirt. The combination of a suitable tool, limited force, and a compatible method often matters more than an unusual ingredient added to a homemade mixture.
The next practical step
Choose the next step from the condition of both the surface and the surrounding construction. Repeated strong products do not substitute for drying and repair.
Keep the successful method straightforward. If useful, note the product, dilution, and observed response so you do not have to guess next time. Reliable improvement comes from appropriate choices and careful execution. Neither an exciting name nor a larger dose replaces checking the actual material and the condition you are trying to improve.