Old Tire? Don’t Throw It Away! Grow Onions Like This Instead!
Old Tire? Don’t Throw It Away! Grow Onions Like This Instead!
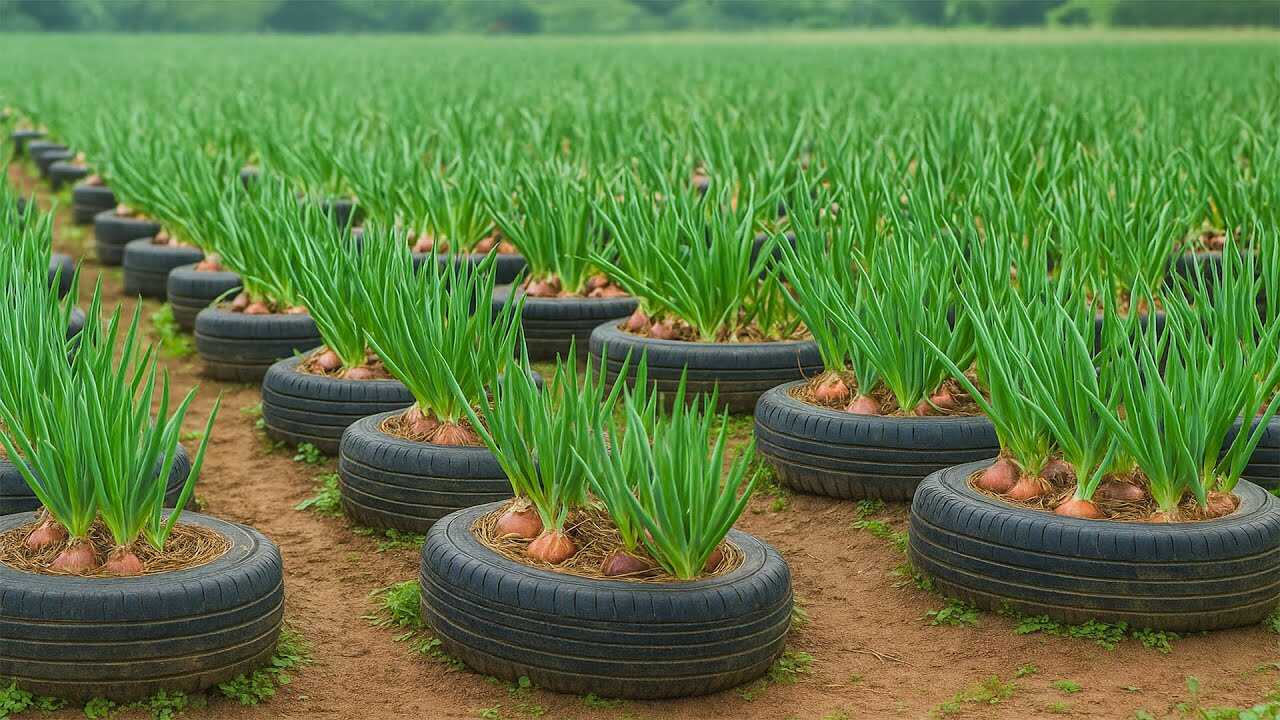
The photo shows stacked old tires reused as round planters, each filled with soil and neat clusters of onion bulbs with strong green tops and straw mulch. If you have an old tire and want a compact, warm, raised-home for onions, this method is practical, space-saving and visually striking. Below I explain exactly how to convert a tire into a productive onion bed, why it works, and how to avoid common mistakes.
Why a tire works for onions (and one important caution)
Black rubber tires absorb and retain heat from the sun. That heat absorption raises soil temperature inside the tire compared with bare ground—this is a real, measurable physical effect. Warmer soil accelerates root activity and can promote earlier bulbing in onions in cool climates. The tire also creates a defined, shallow raised bed that fits the shallow root system of onions and concentrates your soil amendments where the plants need them most.
Important caution: tires can contain chemicals and metals. To minimize any risk of leaching into edible crops, line the inside with a heavy-duty, garden-safe pond liner or place a plastic pot/container inside the tire before adding soil. This retains the thermal and structural benefits while reducing direct soil contact with the rubber.
Materials and exact soil/fertilizer doses per tire
- One cleaned tire (passenger car tire)—wash with soapy water and rinse.
- Drainage: drill or punch 4–6 holes in the bottom if the tire will sit on soil.
- Liner: heavy-duty pond liner or garden-safe plastic to fully cover the inner surface.
- Soil mix (by volume): 2 parts topsoil : 1 part well-rotted compost : 1 part coarse sand or perlite.
- Filling amount: fill tire so you have about 10–20 cm (4–8 in) of loose growing mix above the base—roughly 8–15 liters (2–4 US gallons) depending on tire size.
- At-plant fertilizer (per tire): work in 60 mL (1/4 cup) of balanced granular fertilizer such as 5-10-10 or 10-10-10 mixed into the top 6–8 cm (2–3 in) of soil.
- Side-dress (spring/summer growing season): every 3–4 weeks, apply 15 mL (1 tablespoon) of ammonium sulfate or 15 mL of blood meal per tire for the first 8–12 weeks to support green growth and bulbing.
- Mulch: 2–3 cm (0.75–1 in) straw or shredded bark to reduce moisture loss and keep bulb necks dry.
Step-by-step: build and plant your tire onion bed
- Step 1 — Clean and prepare: scrub the tire to remove grime, dry it, drill drainage holes in the lowest points. Line the interior with the pond liner and poke drainage slits through the liner aligned with the tire holes.
- Step 2 — Mix and fill: combine the soil components (2:1:1). Fill the tire with the mix to about 4–8 in (10–20 cm) deep depending on tire size—enough to cover onion sets with 1–2 cm soil.
- Step 3 — Add starter fertilizer: mix in 60 mL (1/4 cup) balanced granular fertilizer into the top layer of soil before planting.
- Step 4 — Plant onion sets: place onion sets 7–10 cm (3–4 in) apart in a circle or grid. Push each set so the top of the bulb is just covered (about 1 cm / 0.5 in of soil).
- Step 5 — Mulch and water: lightly mulch with straw, water thoroughly to settle the soil. Aim for an even moisture level—onions need consistent water during bulb formation.
- Step 6 — Ongoing care: side-dress with the 15 mL fertilizer every 3–4 weeks for the first 2–3 months. Check soil moisture weekly; in hot weather water twice per week if the top 5 cm (2 in) dries out.
Practical tips from experience
- Sun: place the tire in full sun—onions need at least 6–8 hours of sunlight for reliable bulbing.
- Spacing pattern: a single tire typically holds 6–12 onion sets depending on size—avoid overcrowding to get plump bulbs.
- Variety choice: use varieties suited to your day-length (short-day for warm winters, long-day for cooler summers) for best bulb size.
- Temperature benefit: in cool springs the tire’s warming effect can move bulbing forward by several weeks compared with open ground; expect bulb development over 10–16 weeks depending on variety.
- Pest control: keep the area weed-free, pick off onion thrips by inspection, and rotate crops each year to avoid soil-borne diseases.
Common mistakes to avoid (real botanical reasons)
- Too deep planting: burying sets too far delays shoot emergence and reduces bulb size. Onion sets should be barely covered (≈1 cm).
- Overwatering: standing wet soil causes neck rot and fungal disease—ensure drainage holes and keep soil moist but not waterlogged.
- Neglecting nitrogen early: onions need nitrogen for leaf growth. If you skip early feeding, leaves stay short and bulbs remain small.
- Overcrowding: crowding leads to skinny bulbs and greater disease pressure—respect the 7–10 cm spacing.
- Using an unlined tire for edibles without caution: direct soil contact with old rubber may increase exposure to trace contaminants—use a liner for edible crops, or reserve unlined tires for ornamentals.
Timeline and what to expect
From planting sets to harvest expect several weeks to several months—plan on roughly 10–16 weeks for most onion varieties to form mature bulbs. Monitor the tops: harvest when leaves yellow and fall over, then cure bulbs in a dry, airy spot for 2–3 weeks before long-term storage.
Final encouraging note
Turning an old tire into an onion planter is a small, sustainable win: you reuse material, create a warm microclimate that helps bulb development, and gain a tidy, portable bed ideal for small spaces. Follow the lining, soil, spacing and feeding steps above, give your onions full sun and consistent moisture, and you’ll be rewarded in a few months with healthy, homegrown bulbs. Ready to try it? Clean a tire, mix your soil, and plant your first onion sets this season!