Orchids grow new roots and bloom all year round just this way
Orchids grow new roots and bloom all year round just this way
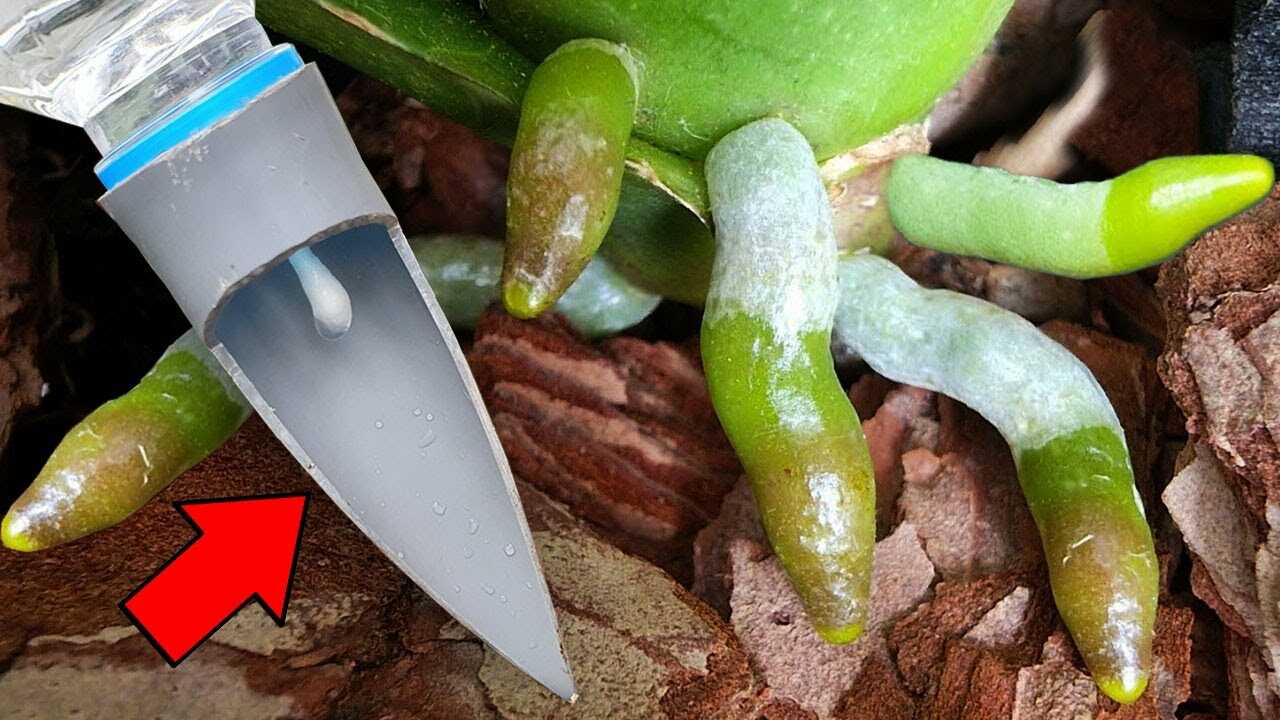
The photo clearly shows chunky **orchid bark** (large pieces of pine/fir bark) beneath healthy-looking aerial roots and a watering nozzle. That coarse **bark potting mix** is the star here — it controls aeration, drainage and the micro-environment around orchid roots. Use the bark the right way and you’ll stimulate steady new root growth and healthier, longer-lasting blooms.
Why chunky bark matters (the botanical fact)
Chunky bark is slow‑decomposing, high in lignin and creates large air spaces around roots. For epiphytic orchids (like Phalaenopsis, Cattleya, Dendrobium) these air-filled pockets are essential because orchid roots rely on oxygen as much as water. Good aeration reduces anaerobic conditions that cause root rot and encourages roots to produce new root tips. Think of **coarse bark** as oxygen-rich scaffolding for roots — not a fertilizer, but a structural tool that lets roots breathe and grow.
Step-by-step: repot with chunky bark to trigger root growth
- When to repot: In spring or early summer (after bloom) — repot every 12–18 months or sooner if bark is dark, compressed or smells sour.
- Choose particle size: Use bark pieces roughly 0.8–1.5 cm (about 3/8″ to 5/8″) for Phalaenopsis and similar epiphytes. Smaller particles retain too much moisture; larger pieces suit mounted types.
- Mix recipe (standard): 70% chunky orchid bark + 20% horticultural charcoal + 10% coarse perlite. For orchids that prefer more moisture (young plants), do 50% bark + 50% long‑fiber sphagnum.
- Prep the bark: Rinse bark to remove dust. Soak in warm water for 4 hours to rehydrate the pieces; drain well. This rehydration prevents the bark from pulling moisture out of fresh roots.
- Remove and inspect roots: Take the orchid from its pot, gently free roots from old bark. Trim black, mushy or papery roots back to healthy white/green tissue using sterile scissors.
- Optional cut treatment: Dust cut ends lightly with cinnamon powder (a mild, natural antifungal) — this is a common horticultural practice to reduce infection risk after trimming.
- Potting: Place a layer of bark in the pot, position the orchid so roots spread, then fill around roots with bark. Pack gently — do not compress. Keep the crown above the medium.
- First watering: Wait 24–48 hours after repotting to water, then water thoroughly until drainage. This allows any damaged roots to callus and reduces rot risk.
Precise care dosing and schedule
- Repotting frequency: Every 12–18 months (spring/early summer).
- Watering schedule: After establishment, water until runoff. In warm months water roughly every 7–10 days; in cool months every 10–14 days — always adjust to pot dryness and local humidity. With chunky bark you should allow the medium to become slightly dry between thorough waterings.
- Fertilizer: Use a balanced orchid fertilizer (e.g., 20‑20‑20) at 1/4 strength weekly during active growth (spring–summer). Reduce to 1/2 frequency in cooler months.
- Expect results: New root tips can appear in 4–12 weeks after repotting if environmental conditions (light, temperature, humidity) are suitable. Maintain consistent care — root development is measured in weeks to months, not days.
Practical tips from experience
- Don’t overpack: Too tightly packed bark reduces airflow — the goal is stable support with lots of air spaces.
- Particle choice matters: If your home is very dry, choose slightly smaller pieces or mix in sphagnum to raise moisture retention. If your home is humid, larger pieces keep roots from staying wet too long.
- Keep the crown dry: Never bury the crown in bark — that invites crown rot. The crown and new growth points must remain exposed.
- Use clear pots for Phalaenopsis: They let you monitor roots and know when the bark is dry enough to water.
- Fresh bark beats additives: Old, blackened bark holds pathogens. Replacing bark at the right interval is more effective than constant chemical “fixes.”
Common mistakes to avoid
- Using decomposed bark: Old bark compacts, retains too much water and suffocates roots. If bark fragments into fine particles, replace it.
- Watering on a rigid schedule: Don’t water by calendar alone; check the medium. Chunky bark dries faster than moss — water when the medium is mostly dry between waterings.
- Overfertilizing after repotting: Avoid heavy feeding for 2–3 weeks post‑repot while roots recover; resume gentle fertilization afterward.
- Burying the crown: This causes rot and is a leading cause of orchid failure after repotting.
Final encouragement
That chunky bark you see in the photo is more than filler — it’s the foundation for an oxygen-rich root environment that encourages new root tips and healthier, longer-lasting blooms. Repot thoughtfully with the right particle size, keep the bark fresh, and pair it with correct watering and light. Over the next 4–12 weeks you should notice steady root activity; over the season your orchid will reward you with stronger growth and more reliable flowering. Try this bark-first approach on your next repot — your orchids will thank you.