Recycle Trash Into A Beautiful Automatic Watering Garden
Recycle Trash Into A Beautiful Automatic Watering Garden
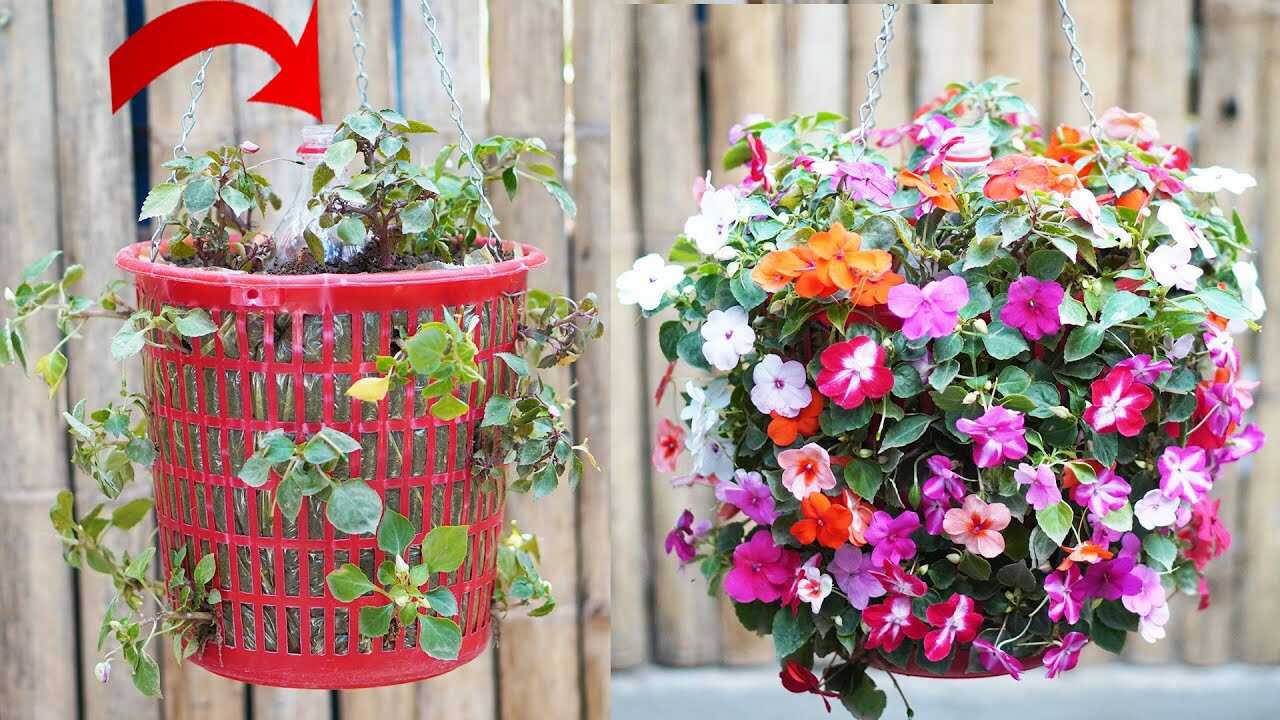
In the photo you can see a clear **plastic bottle** repurposed as a small water reservoir tucked into the centre of a hanging basket made from a red plastic laundry-style container. This simple recycled bottle becomes the heart of an easy, effective **self-watering hanging basket** that keeps soil evenly moist for weeks and reduces daily watering chores.
Why a plastic bottle works (the botanical logic)
A sealed or small-holed bottle buried in the soil acts as a **water reservoir** that releases moisture slowly by gravity and soil capillary action. Consistent moisture reduces root stress, improves nutrient uptake and helps shallow-rooted annuals (like impatiens and other bedding plants shown) maintain steady flowering. This is a practical, verifiable horticultural principle — not a miracle: it complements proper light, drainage and feeding.
What you’ll need (recycled and simple)
- 1 clean PET bottle (1.25–1.5 L for baskets 20–30 cm; 2 L for larger baskets)
- Drill or heated nail to make small holes (2 mm)
- Good potting mix with some drainage perlite or coco coir
- Hanging basket with drainage holes (the red plastic basket pictured works well)
- Mulch or shredded bark to reduce surface evaporation
Step-by-step: make a reliable bottle reservoir
Follow these precise steps to convert a bottle into a dependable automatic watering unit for a hanging basket.
- Clean the bottle: Rinse thoroughly to remove residues. A clear bottle is easiest to monitor.
- Make release holes: Drill or melt 4–6 small holes (~2 mm) evenly spaced around the lower one-third of the bottle. For a 2 L bottle use 6–8 holes. These small holes provide slow, controlled release.
- Optional cap vent: Leave the cap on to slow flow, or poke a tiny vent hole in the cap (1 mm) to prevent a vacuum that stops flow. Test flow before planting.
- Place in basket: Fill the hanging basket halfway with potting mix, set the bottle centrally upright with the mouth above the soil level so you can refill, then pack soil firmly around it so the holes sit 3–5 cm below the soil surface.
- Plant around the bottle: Plant your annuals or trailing plants so roots grow toward the moist soil around the reservoir. Finish filling with mix and add a 1–2 cm mulch layer to reduce evaporation.
- Fill and test: Fill the bottle to capacity with water. Observe flow for 10–15 minutes — you should see slow seepage, not a stream.
Exact doses and refill schedule (be consistent)
Use one 1.25–1.5 L bottle per 20–30 cm hanging basket; use a 2 L bottle for baskets 35–45 cm. Fill the bottle to its full capacity each time.
- Summer (warm, high evapotranspiration): Refill every 5–7 days.
- Spring / Fall (moderate demand): Refill every 10–14 days.
- Winter / cool, sheltered conditions: Refill every 3–4 weeks or as needed — plants use much less.
Expect steady benefits to appear over a period of several weeks; most growers see reduced wilting and more consistent flowering within 3–6 weeks of starting the system when combined with correct light and feeding.
Practical tips from experience
- Match bottle size to pot size: Too-small reservoirs empty too quickly; too-large can reduce root space. The sizes above are a good guideline.
- Use small holes: 2 mm holes avoid boggy soil and slow the release; larger holes will flood the potting mix and risk root rot.
- Keep soil free-draining: Add perlite or coco coir to potting mix so the soil around the holes wicks rather than becomes waterlogged.
- Top up with fertilizer: Add a water-soluble fertilizer to the refill water at half label strength every two weeks during the growing season to supply nutrients evenly.
- Clean monthly: Remove and rinse the bottle monthly to avoid algae or debris blocking holes, especially if the mouth is left open to refill.
Common mistakes to avoid
- Don’t block drainage: Never seal a pot’s drainage holes — the reservoir supports moisture but the container still needs free drainage to avoid anaerobic conditions.
- Avoid oversized holes: Big holes create saturated pockets and can trigger root rot; use several small holes instead.
- Don’t rely on the bottle alone: This is an aid to watering, not a replacement for correct light, regular feeding, pruning, and appropriate plant choice.
- Don’t bury the mouth deep: Leave the bottle mouth accessible so you can refill and inspect; burying it completely makes maintenance hard and increases stagnation risk.
Conclusion — small recycle, big reward
With one clear **recycled bottle**, a hanging basket transforms into an almost automatic watering system that reduces daily chores and keeps plants happier through heat and busy weeks. Follow the exact hole sizes, bottle-to-basket ratios and refill schedule above, pair the reservoir with good potting mix and feeding, and you’ll see steady improvement in plant vigor over 3–6 weeks. Try it this season — refill a bottle, hang your basket, and enjoy more blooms with less fuss.
Ready to start? Gather a clean bottle and a basket today — your plants (and your schedule) will thank you.