Skip the meat for this zucchini! A recipe so delicious you make it three times a week
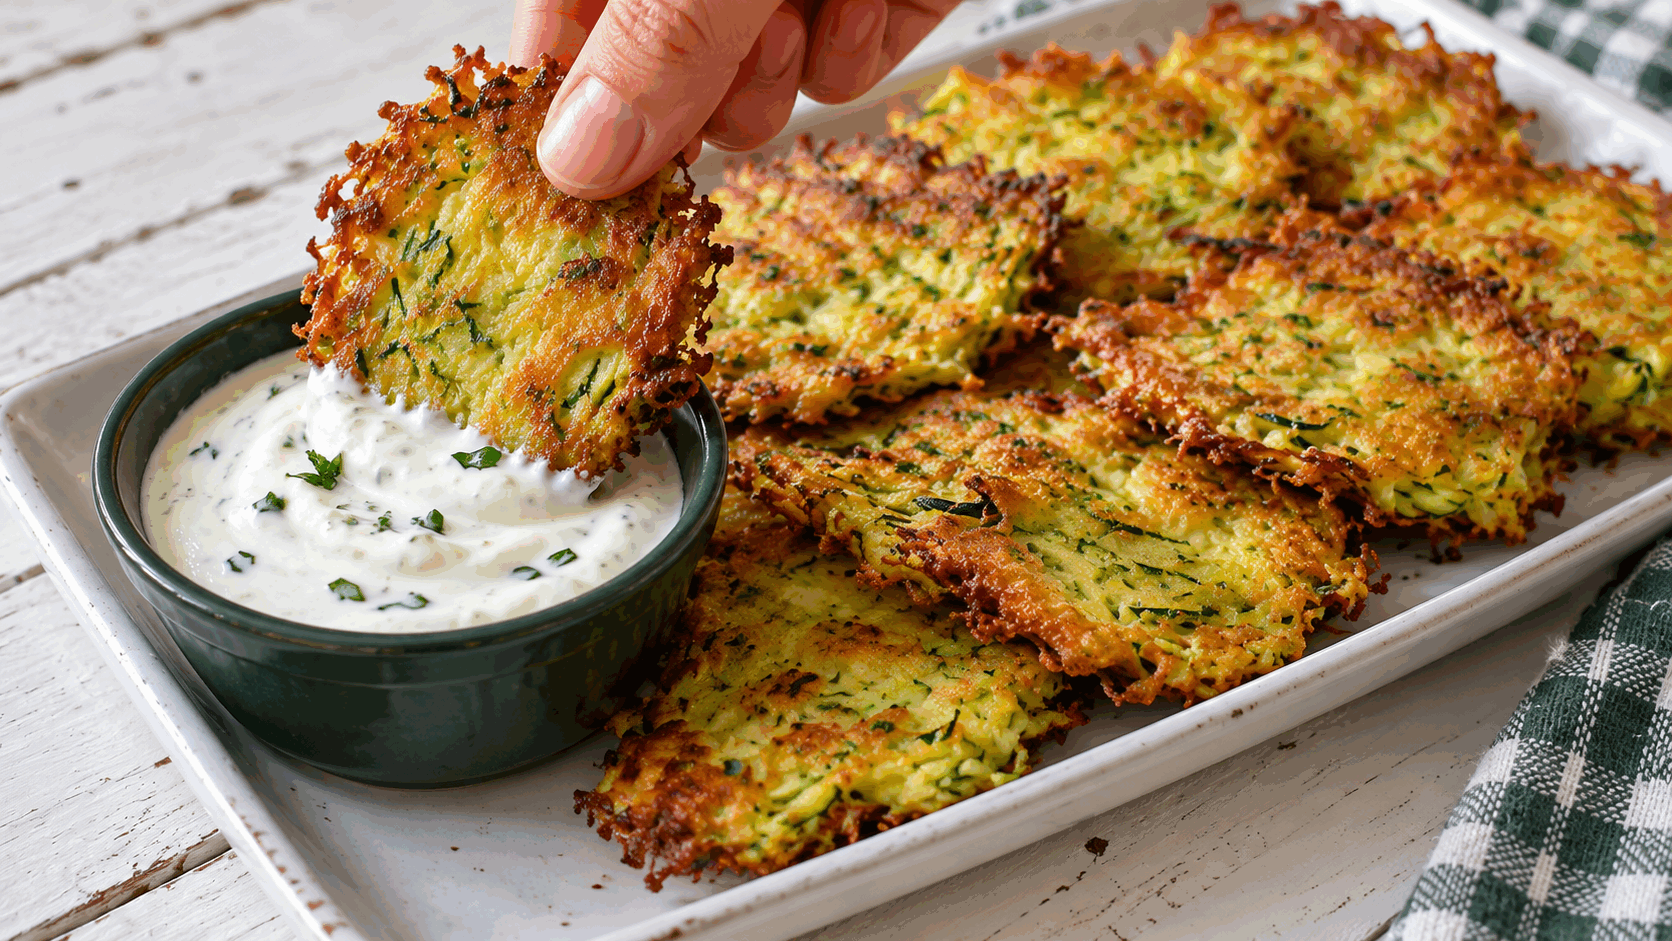
A batch of zucchini fritters can become an easy dinner when you prepare the vegetable carefully and cook small, even portions. The golden exterior is most noticeable immediately after cooking. Serve them with suitable sides to make the meal as substantial as you need.
The quantities below give you a clear starting point. Cooking times are estimates rather than a guarantee for every appliance. Portion size, ingredient moisture, and the depth of the mixture all influence the result. Use the texture checks alongside the timer, especially the first time you make the recipe in your own kitchen.
Quick zucchini and cheese fritters: ingredients and timing
For about 10 fritters: 500 g zucchini, 2 large eggs, 70 g shredded cheese, 50 g all-purpose flour, 1 small grated garlic clove, dill, pepper, a little salt, and 1–2 tablespoons oil.
Allow 20 minutes for preparation, including draining, and about 15 minutes to cook in batches.
Measure the ingredients before starting and prepare the pan or baking dish. The same mixture behaves differently when spread thinly or packed into a deep layer. Choose the suggested dimensions for the first attempt. If you change the container considerably, expect to reassess the cooking time and the condition of the center.
Check whether weights refer to ingredients before or after trimming and draining. Moisture is part of the recipe, so squeezing, draining, and resting are meaningful steps. A very wet ingredient cannot always be substituted for a thicker version without changing the balance. Keep notes when a particular brand or size works well.
Step-by-step preparation
- Grate the zucchini, salt lightly, and leave for 10 minutes.
- Squeeze firmly.
- Mix with eggs, cheese, flour, garlic, and dill.
- Cook small flattened spoonfuls in a lightly oiled skillet over medium heat for approximately 3–4 minutes per side, until the centers are fully set.
Follow the sequence rather than combining everything immediately. A short draining or resting stage can be used to prepare the serving dishes and clean the work surface. This saves active time without removing the pause that develops the intended texture. Rushing that stage often creates a mixture that is harder to handle later.
Scrape down the sides of the bowl to distribute ingredients evenly. Once the mixture is combined, stop unless the instructions specifically call for more mixing. A perfectly smooth appearance is not always the goal. When a recipe includes baking powder, have the cooking setup ready before the wet and dry ingredients are brought together.
The texture to look for
The mixture should hold together on the spoon. Make a small test fritter to check seasoning and heat before cooking the remaining batch.
Judge consistency after the recommended rest. Oats and other absorbent ingredients need time to take up moisture. Adding a large amount of dry material immediately can produce a dense result once everything has hydrated. If a correction is needed, make a small adjustment and assess it again instead of repeatedly adding ingredients without measuring.
Do not taste raw mixtures containing eggs or uncooked flour. A small fully cooked test portion is a better way to check seasoning in a savory recipe. It also reveals whether the cooking surface is too hot and whether the portion holds together. Cheese varies in saltiness, so add salt with that variation in mind.
Common mistakes and how to avoid them
Skipping the squeezing stage makes the patties fragile. Very thick portions brown before their centers set. Cook a small test patty before filling the skillet.
Doubling the ingredients does not mean that the same pan will work in the same time. A thicker layer changes how the center cooks. Two similar batches are often easier to control than one very deep batch. Leave sufficient space when portions need a dry, browned surface, and avoid crowding them into contact merely to finish sooner.
Record the actual cooking time and the size of the portions you made. If something needs improvement, change one important detail next time. Altering the flour, liquid, pan, temperature, and portion size together makes it difficult to identify what happened. A short practical note is more useful than guessing at several adjustments at once.
Variations and substitutions
Use parsley or chives instead of dill. For a gluten-free version, choose certified gluten-free oats and check the other ingredients.
Choose substitutions according to their function. An ingredient that binds a mixture is not interchangeable with one that only adds flavor. The moisture and fat content also matter. Make the basic version first if possible, then experiment with one change so that its effect is clear.
Check every label when cooking for someone with an allergy or dietary restriction. A recipe without wheat flour is not automatically gluten-free. Oats need appropriate gluten-free labeling when that is required. Also account for eggs, milk, nuts, and any packaged additions. Optional toppings can change the suitability of the finished dish even if the base recipe fits.
No added sugar does not mean no naturally occurring sugars. Fruit and dairy can contribute sugars of their own. Likewise, a vegetable dish described as an alternative to meat does not automatically provide the same nutrients as a serving of meat. Consider the whole meal and the portion you intend to serve.
Serving and storing the finished dish
Serve warm with plain yogurt and a tomato salad. Keep the sauce on the side to avoid softening every patty at once.
Serving time affects texture. Some foods benefit from a short rest before cutting, while crisp surfaces soften if trapped steam cannot escape. Follow the guidance for this particular preparation. Avoid sealing a very hot dish immediately in a deep container solely to preserve its fresh appearance; condensation can quickly change the surface.
Refrigerate perishable leftovers promptly in clean, suitable containers. As a general food-safety limit, do not leave them at room temperature for more than two hours, or one hour above 90°F. Use shallow containers when needed to help food cool safely. Plan to use these leftovers within a few days and be more conservative if the ingredients require it.
Take out only the portion you will serve. Repeatedly warming and cooling the whole batch affects quality and complicates safe handling. Reheat cooked leftovers intended to be eaten hot thoroughly, reaching 165°F in the center. Keep dishes intended to be served chilled refrigerated until serving time.
Planning the next batch
Can the preparation be started ahead? Measuring ingredients and preparing equipment are usually easy steps to do early. Fully mixing a batter may be different: vegetables can release more liquid, and leavening can begin reacting. Do not assume every prepared mixture will behave identically after a night in the refrigerator.
Can the recipe be made faster by raising the temperature? A hotter exterior does not necessarily produce a cooked center. Use the temperature as a starting point and monitor the result. Smaller, evenly sized portions can be easier to control, but they also need checking sooner.
Will additional seasoning fix a soft or dense texture? Seasoning changes flavor rather than moisture balance or thickness. Correct the preparation technique first. Once the base works, herbs, spices, and serving sauces can be adjusted to your taste without disguising an avoidable problem.
Measuring accurately without extra work
A kitchen scale makes it easier to repeat the result. Place an empty bowl on the scale and reset it before adding an ingredient. Measure small quantities of baking powder with a level measuring spoon rather than a heaped household spoon. For a smaller batch, write down the reduced quantities before you start mixing.
Use a consistent spoon or scoop when dividing portions. Similar sizes make timing easier and prevent one piece from being ready while another remains underdone. If you prepare a shared platter, that consistency also helps with serving. Keep the practical details from the successful batch so the next attempt starts from evidence rather than memory.
The detail that matters most
Removing water and keeping each fritter thin helps create browned edges with a tender cooked center.
Keep the first successful proportions and adapt only what you need for the next meal. Clear measurements, a deliberate sequence, and a check of the center give you more control than a promise that every batch will look identical. The recipe becomes easier when you know how your own ingredients, pans, and appliance behave.