Sprinkle 1 Teaspoon! Hundreds Of Orchid Branches Explode!
Sprinkle 1 Teaspoon! Hundreds Of Orchid Branches Explode!
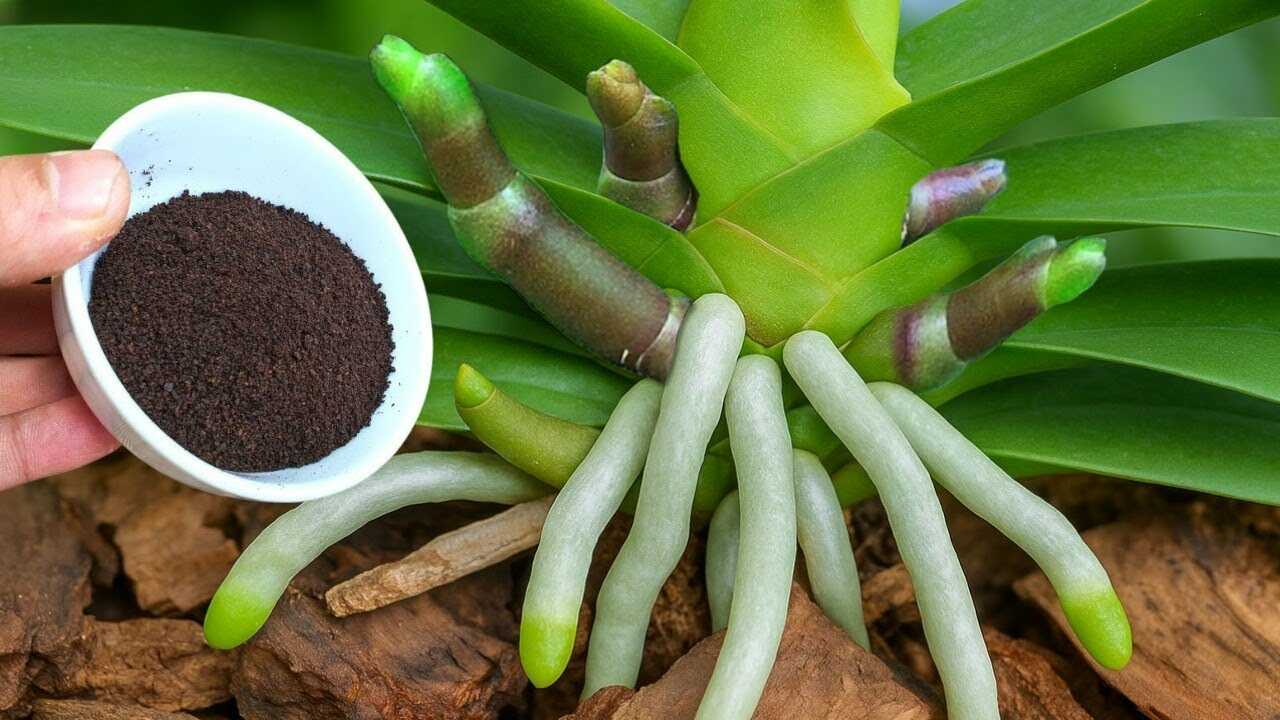
In the photo you can clearly see a small white bowl of dark brown, finely ground used coffee grounds being held beside a green Phalaenopsis-style orchid with plump aerial roots and bark beneath. This article explains how a tiny pinch of those used coffee grounds—properly prepared and applied—can support healthier orchid root growth and encourage more branch-like root tips over several weeks.
Why used coffee grounds for orchids?
Used coffee grounds are mostly organic matter and contain modest, verifiable amounts of plant nutrients—notably **nitrogen**, plus small amounts of **phosphorus** and **potassium**—and they promote microbial activity in potting media. When used correctly as a thin surface amendment with epiphytic orchids, they can slowly release nutrients and improve the micro-environment around aerial roots without replacing proper orchid care (light, watering, drainage, balanced fertilizer).
Precise recipe and preparation
- Collect: Use only cold, used (spent) coffee grounds from brewed coffee—no oily flavored pods or coffee with added oils.
- Dry: Spread the grounds thinly on a tray or sheet of paper and air-dry for 24–48 hours until free-flowing. This reduces mold risk.
- Sieve: Pass through a small mesh to remove clumps or larger particles. You want a fine, crumbly texture so it won’t mat.
- Store: Keep in a sealed jar in a cool, dry place short-term (up to 2 weeks) if you’re not using it immediately.
Step-by-step application (exact dose and timing)
- Dose: 1 teaspoon (about 2–3 grams) of dry used coffee grounds per orchid pot up to 4–5 inches (12 cm) diameter. For larger pots, increase to 1.5 teaspoons per additional 4 inches of pot width.
- When: Apply only during the plant’s active growth season—spring through mid-summer. Expect to repeat applications at a consistent interval (see frequency below).
- How to apply: Gently remove any loose bark chips on the surface. Sprinkle the 1 teaspoon of dried grounds evenly on top of the bark around the aerial roots—avoid piling directly against the crown or burying roots. Lightly tuck a tiny amount into the top 0.5 cm of bark if the mix is chunky, but do not mix grounds deep into the potting media.
- Settle: Mist the surface lightly once after application to settle the grounds; do not soak. Keep typical orchid watering schedule thereafter.
- Frequency: Repeat every 4 weeks during spring and summer. In autumn reduce to every 6–8 weeks. Do not apply during winter dormancy.
What to expect and realistic timeline
Used grounds are a slow, supplemental input. Over a consistent program you may notice improved root tip activity and some additional branching in roots over a period of 6–12 weeks. Visible improvements in flowering depend on many factors (light, temperature, fertilizer); grounds are a support, not a bloom trigger.
Practical tips from experience
- If your orchid is in a very fine, compact mix, use even less or simply dust the top—grounds can increase moisture retention and compaction if overused.
- Always use used (spent) grounds. Fresh, wet coffee grounds are more acidic and encourage mold and rot.
- If you see white or green mold forming on the surface after applying grounds, remove the affected layer, let the plant dry a little longer between waterings, and reduce application frequency.
- Combine this practice with a regular balanced orchid fertilizer (applied per label) rather than trying to replace fertilizer entirely with coffee grounds.
Common mistakes to avoid
- Avoid piling grounds against the plant crown—this raises the risk of crown rot.
- Do not mix large amounts of coffee grounds into the potting media for epiphytic orchids—this can compact and suffocate roots.
- Don’t expect rapid results; grounds are a slow supplement. Look for changes only after several weeks of consistent, proper applications.
- Never use oily flavored coffee or grounds contaminated with food waste—these increase pest and mold risks.
Conclusion — try one teaspoon, observe for a season
A small, controlled dose of dry used coffee grounds—just 1 teaspoon per pot each month in the growing season—can gently support root health by adding organic matter and modest nutrients while stimulating beneficial microbes. Remember this is a supplement to, not a replacement for, good orchid care: proper **light**, **watering**, **drainage**, and a balanced **orchid fertilizer** remain essential. Try the method on one plant first, follow the schedule for 2–3 months, and note root tip activity. Share your results and refine the frequency for your specific environment—your orchids will thank you.