Tips for growing orchids in plastic bottles! The flowers bloom forever without fading
Tips for growing orchids in plastic bottles! The flowers bloom forever without fading
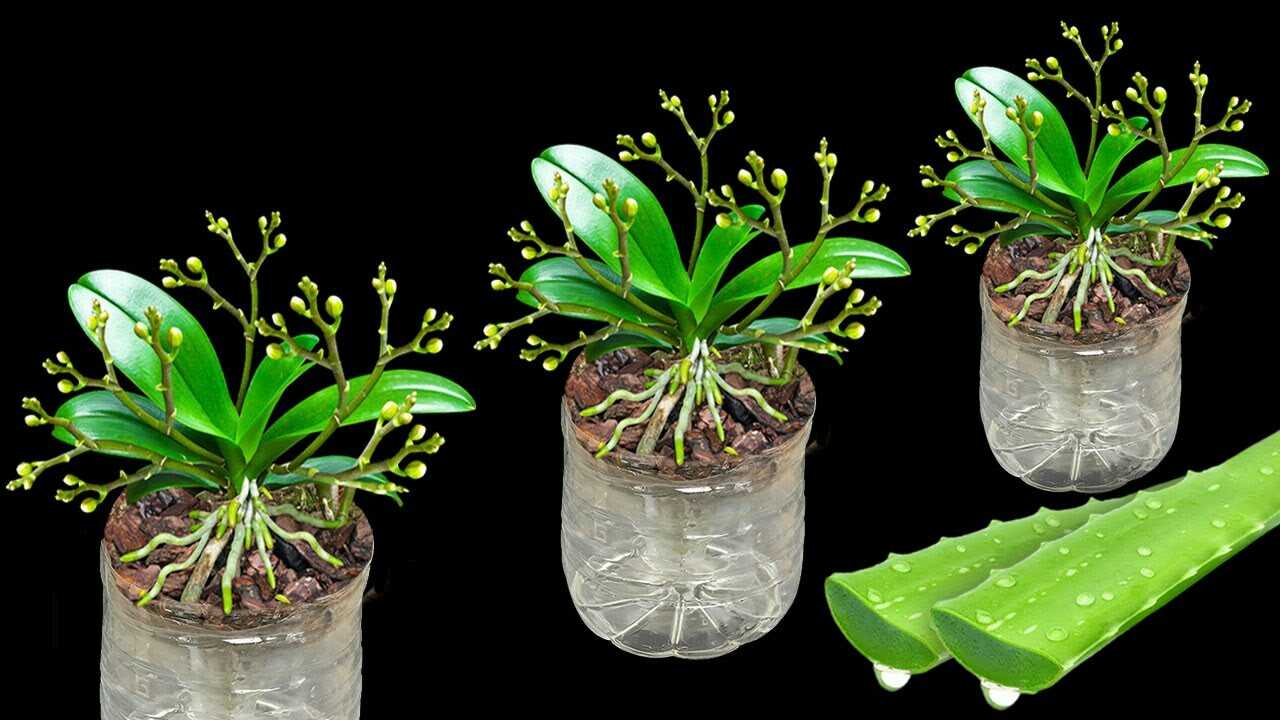
In the photo you can clearly see small Phalaenopsis-style orchids planted in the bottom halves of clear PET plastic bottles, the roots and coarse brown bark visible through the transparent container. This article focuses on using those clear plastic bottle pots — how to prepare them, why they work for orchids, and precise care to extend bloom life over several weeks to months (not a miracle forever).
Why a clear plastic bottle works for orchids
A clear PET bottle used as a pot gives two real advantages for many epiphytic orchids. First, many orchid roots are green and can perform some photosynthesis, so a transparent pot lets roots receive light and helps the plant’s energy balance. Second, the transparency makes it easy to monitor root health and moisture, reducing risk of hidden overwatering and root rot. Plastic is lightweight, inexpensive and retains modest humidity — useful when combined with proper drainage and ventilation.
Step-by-step: prepare a plastic bottle pot and plant your orchid
- Materials: clean clear PET bottle (500 ml–2 L, depending on plant size), sharp scissors or utility knife, drill or heated nail, coarse orchid bark (pine bark chunks 1–2 cm), horticultural charcoal (optional), a healthy orchid plug or division.
- Cut the bottle: cut the bottle about one-third to one-half from the bottom so the lower section is a stable cup. Smooth edges with sand or tape. Keep the top as a removable collar if you want to create a humidity dome.
- Drainage holes: make 4–6 drain holes in the base, each about 4–6 mm in diameter (or several small holes totaling the same area). Good drainage prevents standing water and root rot.
- Base layer: place a 0.5–1 cm layer of horticultural charcoal or coarse perlite at the bottom to improve aeration and reduce pathogens.
- Fill with medium: add orchid bark so the media fills about 75% of the bottle height, leaving 1–2 cm from the rim for watering. Use media with particle size ~1–2 cm for Phalaenopsis-style orchids; fine soil will compact and suffocate roots.
- Planting: set the orchid so roots gently rest on the bark without burying the crown. If roots are long, position them curled naturally; do not compress. Firm the bark lightly around roots to stabilize the plant.
- Initial water: water thoroughly until water drains from the holes. Allow the media to drain fully before returning to its display place.
Watering, feeding and seasonal schedule (precise doses)
Watering frequency: in coarse bark, water by soaking until water runs out of the holes. Summer (active growth): every 5–7 days. Cooler months/winter (slower growth): every 10–14 days. Adjust for indoor humidity — higher humidity means less frequent watering. Always let the top two-thirds of the bark dry slightly between soaks.
Fertilizer dose & frequency: use a balanced water-soluble orchid fertilizer (for example 20-20-20 or a dedicated orchid formula). Mix at 1/4 to 1/2 of the label strength. Apply every 2 weeks during spring and summer growth; reduce to once monthly in fall and winter. After 6–8 weeks of feeding, perform a full flush (see next).
Monthly flushing: to avoid salt buildup, flush the potting medium monthly by pouring water through the pot equal to about 2–3 times the pot volume (e.g., for a 500 ml bottle, pour ~1–1.5 L slowly) until clear water drains. Allow to drain fully.
Light, temperature and humidity basics
- Light: bright, indirect light. Clear pots are helpful, but avoid midday sun on the plastic — it can overheat roots. East or west windows with morning or late-afternoon sun are ideal.
- Temperature: most Phalaenopsis prefer day 18–28°C (65–82°F) and night 15–20°C (59–68°F).
- Humidity: aim for 50–70% relative humidity. Use a humidity tray or group plants. The bottle helps retain local humidity but still needs air movement to prevent fungal issues.
Practical tips from experience
- Monitor roots visually: through the clear bottle you can see if roots are firm and green (healthy) or brown/soft (overwatered). Replace media if many roots are decayed.
- Use breathable pot placement: elevate the bottle slightly on a saucer or slotted tray for airflow under the drain holes.
- Control light exposure: if roots show bleaching or the bottle warms excessively, wrap the sides with a strip of green shade cloth or place in a brighter but indirect spot. Some growers prefer clear pots for root observation but shade the sides during the hottest hours.
- Repotting interval: repot every 12–18 months into fresh bark to maintain aeration and avoid compaction.
Common mistakes to avoid (real botanical errors)
- Burying the crown: placing potting media over the orchid crown encourages crown rot. Keep the crown exposed and the media around roots only.
- No drainage holes: failing to add holes leads to stagnant water and root rot, especially in plastic containers.
- Using garden soil: regular potting or garden soil holds too much moisture and suffocates orchid roots; always use coarse orchid bark or an appropriate epiphyte mix.
- Over-reliance on the bottle: the bottle is a tool for monitoring and humidity; it does not replace proper light, watering discipline, or fertilization.
What to expect and timeline
This method helps you keep roots healthier and can increase bloom longevity and frequency over several weeks to several months, depending on species and care. You should see clearer signs of improved root coloration and reduced rot within 4–8 weeks if you adopt proper watering and fresh bark. Flowering schedules remain species-dependent — this technique supports longer, healthier bloom periods but is not a permanent guarantee that flowers will never fade.
Conclusion — try a bottle pot this season
Using a clear plastic bottle as a mini pot is an inexpensive, practical way to give epiphytic orchids better root visibility, aeration and controlled humidity. Follow the exact cutting, drainage and watering routines above, feed at the recommended diluted rates, and repot annually. If you try this, observe root color and moisture over the next several weeks and adjust watering to your home’s conditions. Share a photo of your bottle-grown orchid and your results — small changes often make blooms last noticeably longer.