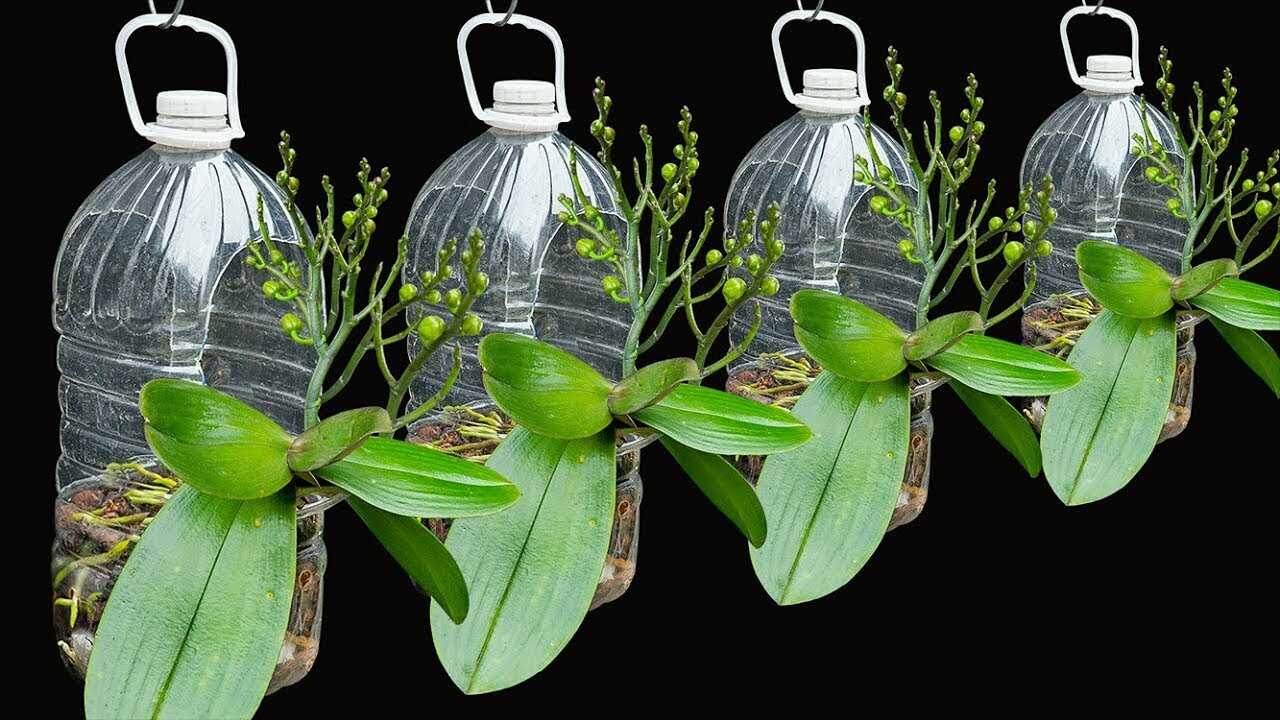
Don’t be afraid of the orchid dying, growing it in a plastic bottle will have many new flowers
Don’t be afraid of the orchid dying, growing it in a plastic bottle will have many new flowers
What you see in the photo is a clear plastic bottle repurposed as a miniature hanging planter for an epiphytic orchid (Phalaenopsis-style). The **clear PET bottle** creates a small, humid microclimate around the roots and leaves while keeping the plant suspended and well‑ventilated when prepared correctly. This simple hack can encourage more frequent flowering by stabilizing humidity and protecting aerial roots without replacing good basic care.
Why a plastic bottle works (botanical facts)
Orchids like Phalaenopsis are naturally **epiphytic**: their roots are adapted to absorb moisture and oxygen from humid air rather than heavy, water-retentive soil. A clear bottle provides three verifiable benefits:
- Higher local humidity around the roots and crown, reducing transpiration stress and helping spike development during growth periods.
- Diffused light through clear PET (not direct sun), which supplies enough ambient light for photosynthesis while avoiding leaf scorch.
- Protection with controlled ventilation – when you add drainage and vents, the bottle creates a stable microclimate that still allows air exchange, preventing suffocation of aerial roots.
Materials and precise preparation (step-by-step)
Gather: a 1.5–2 L clear PET bottle, coarse orchid bark, horticultural charcoal, coarse sphagnum moss, a drill or heated nail, scissors, thin wire or S-hook for hanging.
- Cut the bottle: measure about one-third of the bottle height from the bottom and cut so that the bottom section (where the roots sit) is ~6–8 cm deep. Smooth edges.
- Drainage & ventilation holes: drill six 8 mm holes evenly spaced around the lower third for drainage/air exchange, plus four 4–5 mm holes near the top edge of the lower section for additional airflow.
- Substrate mix (precise ratio): for the lower 6–8 cm, use 60% medium-grade fir bark, 20% coarse sphagnum moss, 10% horticultural charcoal, 10% coarse perlite — measured by volume (for a 1.5 L bottle that means roughly 2 cups bark, 2/3 cup sphagnum, 1/3 cup charcoal, 1/3 cup perlite).
- Planting: place a small layer of bark, position the orchid so roots sit against the bottle wall and have air contact, then gently fill around roots to secure the plant. Leave room so roots are not compressed.
- Seal & hang: reattach the top half as a hood if you wish, or use the bottle’s neck with wire to hang. The cap may remain loose or be removed for better ventilation.
Watering, fertilizing and seasonal schedule (precise doses & frequency)
Follow a consistent schedule — the bottle reduces evaporation, so water less often than potted orchids in open pots.
- Spring–Summer (active growth): perform a full soak every 2 weeks: submerge the lower bottle section in room-temperature water for 10 minutes, then let drain 30–60 minutes. Between soaks, mist the roots and under-leaf area twice weekly.
- Autumn–Winter (rest or lower growth): reduce to a full soak every 3–4 weeks and mist once weekly.
- Fertilizer: use a balanced orchid fertilizer at 1/4 of the manufacturer’s recommended concentration; apply during the growth season every 2 weeks by adding fertilizer to the soak water. In autumn/winter, apply once monthly at the same 1/4 strength.
- Flushing: to avoid salt buildup, flush with plain water (soak 10 minutes) once every 6 weeks following a fertilizer soak.
- Ventilation routine: open the bottle (remove cap or lift hood) for 30–60 minutes twice weekly in warm months; in colder months, ventilate once weekly for 30 minutes to reduce fungal risk.
Practical tips from experience
- Use room-temperature, low-mineral water when possible (rainwater or filtered water is best). Hard water increases salt deposits in a sealed environment.
- Do not bury the crown: keep the leaf base above the substrate level to prevent crown rot.
- Positioning: hang where the plant receives bright, indirect light—east- or west-facing window with morning or late-afternoon light is ideal. Avoid direct midday sun on the clear plastic to prevent overheating.
- Replace substrate: every 12–18 months replace the bark/charcoal mix to maintain aeration; older bark breaks down and holds too much moisture.
- Label and observe: write the date of planting and schedule so you follow the soaking/flush routine. Orchids respond to stable care over weeks and months.
Common mistakes to avoid (real botanical reasons)
- Sealing the bottle completely: traps stagnant air and leads to fungal/bacterial rot. Always provide regular ventilation.
- Using garden soil: soil suffocates epiphytic roots and retains too much moisture—this kills orchids faster than drought.
- Overfertilizing: full-strength fertilizer causes salt burn in confined containers. Stick to 1/4 strength as described.
- Too little airflow: roots need oxygen; lack of air plus humidity invites rot. The drilled holes and regular airing prevent this.
- Direct midday sun on clear plastic: the bottle can magnify heat and scorch leaves. Diffuse light is essential.
Conclusion — try it and be patient
Using a clear plastic bottle as a hanging mini‑greenhouse is a low-cost, verifiable way to stabilize humidity around epiphytic orchids and encourage healthy flowering when combined with correct light, watering, and feeding. Follow the exact substrate ratios, hole placements, watering intervals and fertilizer strength above, observe your plant over several weeks to months, and adjust only gradually. If you maintain good ventilation and avoid the common mistakes listed, the bottle method can help your orchid produce more reliable blooms.
Action step: reuse one bottle this weekend—prepare the substrate as directed, plant your orchid, and follow the 2‑week soak and mist routine through the next growing season. Share your progress and note how the roots respond: orchids reveal their health in their root color and new spikes over several weeks to months.