The experiment of growing sweet potatoes on the terrace was surprising
The experiment of growing sweet potatoes on the terrace was surprising
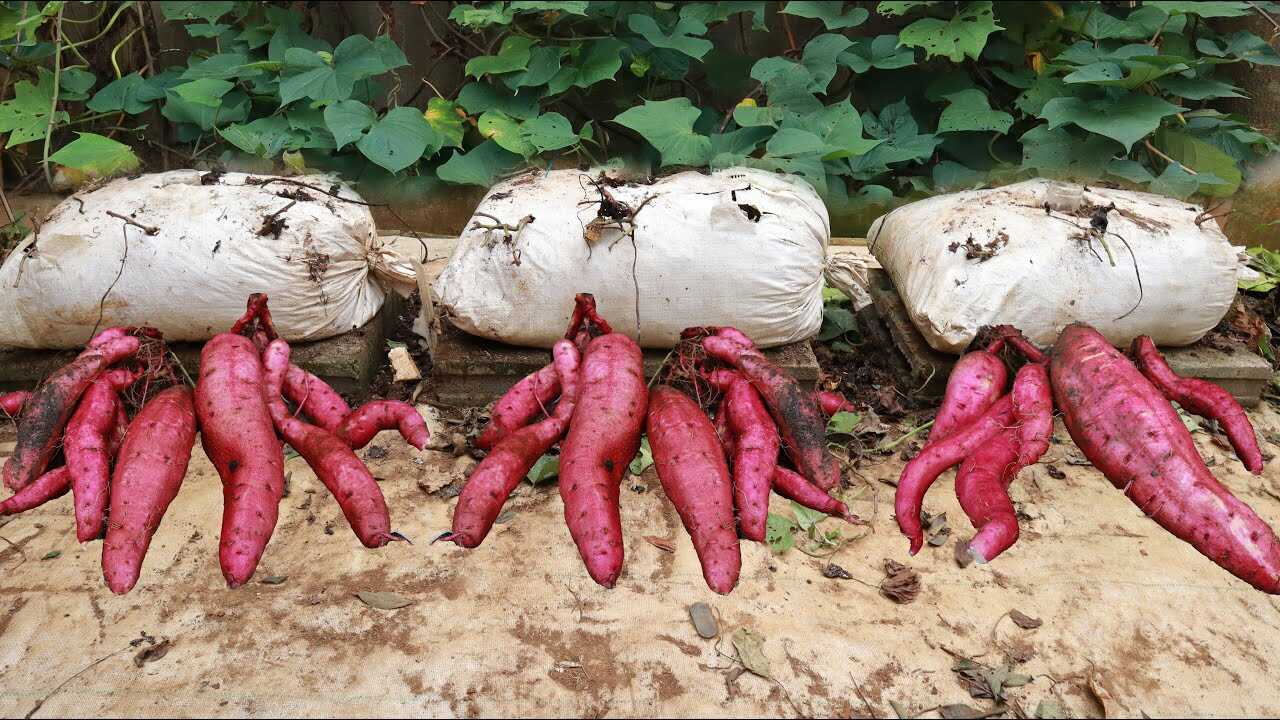
Seeing those bright pink-red sweet potato tubers pulled from white grow bags on a terrace is exactly what this article teaches you to reproduce. The image shows several long, fleshy storage roots—classic sweet potatoes—resting in front of packed grow bags. Below you’ll find a practical, step-by-step, science-backed method to grow sweet potatoes successfully in bags on a terrace, with exact mixes, doses, and timing.
Why focus on these sweet potato tubers?
Sweet potatoes form enlarged storage roots (tubers) when given warm temperatures, loose well-aerated medium, and balanced nutrition. Botanically, tuber development responds to adequate phosphorus and potassium and limited excess nitrogen (too much N promotes vine growth, not tuber formation). On a terrace, grow bags mimic deep, loose soil—perfect for long tubers like the ones in the photo.
Materials and exact recipes
- Grow bags: 40–50 L capacity (one bag per 1–2 plants). Each plant needs roughly 25–35 L of rooting volume.
- Soil mix (per 40 L bag): 20 L good-quality compost, 12 L loamy garden soil, 8 L coarse sand or horticultural perlite. This is roughly 50% compost / 30% loam / 20% coarse drain material.
- Starter fertilizer (at planting): 60 g slow-release N-P-K with a higher P and K ratio (for example 5-15-20) per 40 L bag. If using granular bone meal (phosphorus), add 30 g per bag.
- Slips: healthy 12–20 cm vine slips rooted in water or potting mix. Avoid chemically treated supermarket tubers grown with sprout inhibitors.
- pH target: 5.8–6.5 (slightly acidic). Adjust with garden lime only if pH below 5.5 in a soil test.
Step-by-step planting and care
Follow these steps exactly to reproduce the terrace harvest like the one pictured.
- Step 1 — Prepare bags: Fill each 40 L bag with the soil mix above, leaving 5–8 cm free at the top for watering.
- Step 2 — Add starter fertilizer: Work 60 g slow‑release 5-15-20 into the top 10 cm of the mix for each 40 L bag.
- Step 3 — Plant slips: Place one strong slip per 25–30 cm of surface space. For a single 40 L bag, plant one slip centrally; for longer bags you can plant two slips spaced 30 cm apart. Bury slips up to the first leaf node (approx. 10–15 cm) and firm gently.
- Step 4 — Watering schedule (spring–summer active growth): Water thoroughly after planting. Then keep soil evenly moist—water 3 times per week in hot summer (terrace sun) or every 4–6 days if temperatures are moderate. Reduce watering during the last 3–4 weeks before harvest to improve sweetness and skin finish.
- Step 5 — Fertilize during growth: Side-dress with 30 g of the same slow-release fertilizer per 40 L bag every 6 weeks, or apply a liquid feed (10 ml of a 10-30-20 fertilizer per 10 L water) at a dose of 100 ml per plant every 3 weeks during active tuber formation. Do not increase nitrogen.
- Step 6 — Support and trim vines: Allow vines to trail or train on the terrace. If overly vigorous, trim tips to encourage tuber formation rather than excessive foliage.
- Step 7 — Pest and disease checks: Inspect weekly for signs of fungal rot or weevils. Good drainage and avoiding overwatering are the best prevention.
Timing: when to expect harvest
Sweet potatoes are not fast. Expect a full terrace harvest in 12–18 weeks from planting slips, depending on variety and warmth. Maintain consistent care—light, water, and the feeding schedule above—throughout that period for best yields. Begin checking for maturity at 12 weeks; plan harvest before the first frost.
Post-harvest handling (how the tubers in the photo got that finish)
- Gently brush off excess soil—do not wash raw tubers.
- Curing: keep tubers in warm (25–30 °C), humid conditions for 7–14 days to set the skin and improve sweetness and storage life.
- Storage: store cured tubers in a cool, dark place (12–16 °C) with good ventilation for several months.
Practical tips from experience
- Use untreated slips: some supermarket tubers are treated to prevent sprouting; use certified slips or sprouted tubers from organic sources.
- Bag placement: position bags where they get 6+ hours of sun. Terrace heat is fine—sweet potatoes are heat-loving.
- Drainage holes: ensure bags have adequate holes so excess water can escape; elevated blocks under bags improve air circulation.
- Mulch lightly with straw over bags in very hot climates to keep soil temperature steady and reduce watering frequency.
Common mistakes to avoid
- Overfertilizing with nitrogen — produces lush vines but few tubers. Stick to the lower N, higher P/K plan above.
- Poor drainage — waterlogged soil causes root rot. If bags become soggy, increase coarse material (perlite/sand) next season.
- Planting too late — frost will halt tuber formation; start slips after last frost and when soil warms above ~18 °C.
- Using small bags — tubers need space; cramped bags produce misshapen, small roots. Aim for ≥40 L per plant.
Conclusion — try this on your terrace
The long, rosy tubers in the photo prove that terrace-grown sweet potatoes in bags can be productive and surprisingly large when you match warm conditions, loose mix, correct feeding, and controlled watering. Follow the precise soil mix, planting depths, fertiliser doses and the 12–18 week harvest window above. Start with one or two bags this season, note your results, and scale up next year. Share your success and your photos—there’s nothing more rewarding than pulling sweet potatoes like those shown and tasting the payoff of careful container growing.