The magic from the Potato makes the Rootless Orchid grow instantly
The magic from the Potato makes the Rootless Orchid grow instantly
Introduction — what you see in the photo
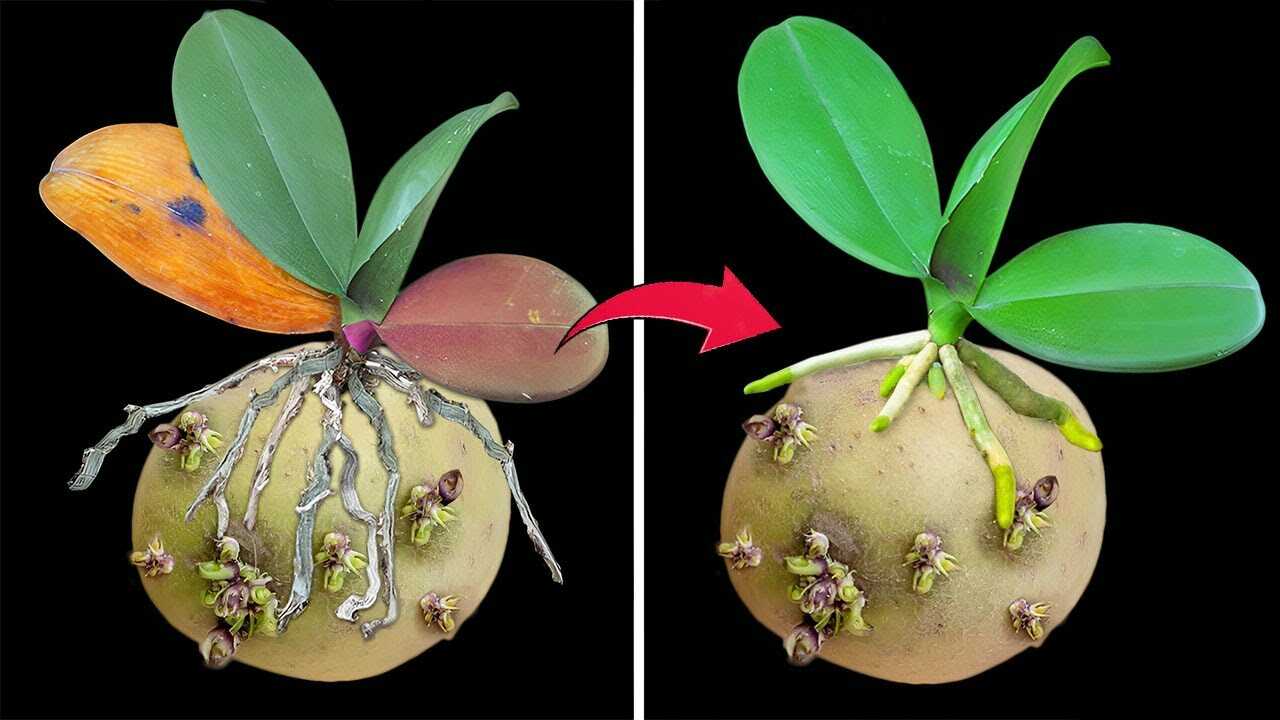
The photo shows a small, firm brown potato used as a mounting / moisture source for a rootless orchid keiki. You can clearly see the tuber’s skin, several sprout eyes, and an orchid with no established roots perched on top. That visual is the exact trick this article explains: using a single potato as a short-term, moisture-rich cradle to kick-start root formation.
Why a potato can help (botanical facts)
A raw potato is ~75–80% water and contains starches plus trace minerals such as potassium and phosphorus. In horticultural practice a moist, nutrient-containing medium can keep delicate basal tissue turgid and reduce desiccation while the plant forms callus and new roots. The potato is not a rooting hormone: it is a temporary moisture reservoir and mild nutrient source that can supplement — but never replace — proper light, humidity, and hygiene during orchid propagation.
Step-by-step method (exact doses and timing)
- Materials: one medium firm potato (~150–200 g), a sterile sharp knife, 70% isopropyl alcohol, ground cinnamon (optional), toothpicks, a small saucer, clear plastic bag or humidity dome, commercial rooting powder (optional, follow label).
- Prepare the potato: wash gently but do not over-scrub off the skin (skin helps retain moisture). Using an alcohol-sterilized knife, cut a shallow well 1.5–2 cm deep and about 1 cm wide where the orchid base will sit.
- Prepare the orchid keiki: cleanly remove any dead tissue from the base. If you want extra help, briefly dip the base in a commercial rooting powder at the manufacturer’s recommended dose. Let excess powder fall off — do not mound it on.
- Insert and secure: seat the orchid base into the potato well so the basal plate makes firm contact with the tuber. Use one or two toothpicks to stabilize the plant without piercing roots. Dust the cut potato surface with a small pinch of ground cinnamon to reduce surface fungal issues.
- Microclimate: place the potato-on-saucer in bright, indirect light (no direct sun). Maintain ambient temperature 20–25 °C (68–77 °F) and relative humidity ~60–80% using a clear plastic bag or humidity dome. Mist the setup once daily to keep surfaces moist but not waterlogged.
- Check and change: inspect weekly for mold, sliminess, or foul smell. Replace the potato every 3 weeks during active growth (spring–summer) and every 4 weeks in cooler, slower seasons. Do not leave the same potato in place longer than a month to avoid rot and pathogen buildup.
When to pot on
Expect visible root initiation within roughly 4–8 weeks if conditions are right. Wait until roots reach at least 2–3 cm (about 1 inch) and show firmness before moving the orchid to a porous orchid mix (bark or sphagnum). After potting, resume normal orchid care and begin diluted feeding once roots are actively growing (1/4 strength fertilizer every 2 weeks).
Practical tips from experience
- Always start with a firm, unblemished potato. Soft or wrinkled tubers are high risk for pathogens.
- Sanitize tools and work in a clean area — the potato can harbor microbes that will exploit any wounds.
- If you see white mold or a slimy surface, remove the orchid immediately, clean the base, and try a fresh potato after surface disinfection (brief 3% hydrogen peroxide rinse then dry).
- Use this potato method as a short-term bridge for delicate keikis; it’s especially useful when a keiki is de-rooted and at risk of drying out before it can form new roots.
Common mistakes to avoid
- Do not bury the potato in soil or keep it in stagnant, dark conditions — that promotes anaerobic rot.
- Avoid large pours of water. The potato should be kept moist, not soggy; overwatering = fast decay.
- Don’t rely on the potato as fertilizer long-term. It provides only temporary moisture and trace nutrients; regular orchid nutrition still required once roots form.
- Never use a moldy or insect-infested tuber — that invites disease transmission to the orchid.
Conclusion — try it, carefully
The image demonstrates a simple, low-cost way to protect a rootless orchid while it regenerates roots: a single medium potato acting as a moisture and carbohydrate buffer. It’s not magical or instant — expect measurable progress in 4–8 weeks — and it must be used with attention to hygiene, light, and humidity. Try the method on one keiki at a time, monitor weekly, and share your results so others can learn from what worked in your conditions.